There’s no better way of impressing your family and friends by smoking a brisket low n slow on your Traeger. The smoked brisket is the pinnacle of barbeque, but it’s also one of the most challenging meats to smoke. Although set-and-forget pellet grills make light work of brisket, there are still several techniques you need to master in order to cook the perfect brisket. I asked some of the most revered barbeque gurus how they smoke a brisket on a pellet grill. In this post, I’ll walk you through every step from the preparation and all through the cook.
To cook a brisket on a Traeger, set the temperature to between 250°F and 275°F and cook until the bark hardens and the internal meat temperature reaches 150°F, which should take 5-6 hours. Then wrap the brisket in foil or butcher paper and cook for an additional 4 hours until it reaches an internal meat temperature of 203°F or feels like butter when poked. Before cooking, trim the fat cap to 1/4 inch and remove the silver skin, and optionally apply a binder such as olive oil or mustard and season with a barbeque rub. After cooking, let the brisket rest for 1 hour or place it in a dry cooler for up to 4 hours.
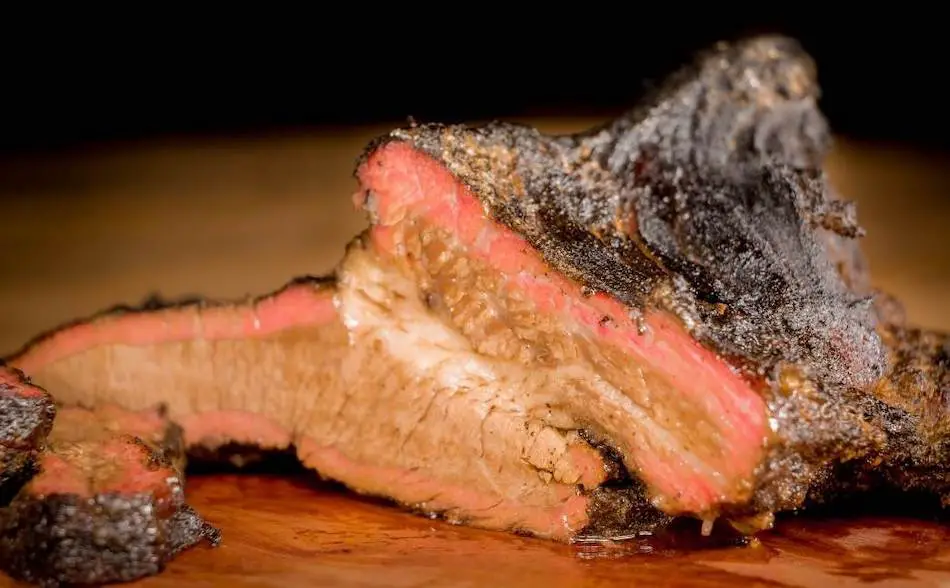
Brisket on a Traeger
Tender, juicy beef brisket cooked low-and-slow with wood smoke.
Ingredients
- Brisket
- Barbecue rub
- Olive oil or yellow mustard
Instructions
- Set the temperature of your Traeger between 250°F and 275°F.
- Leave the brisket until the bark hardens and the internal meat temperature goes beyond 150°F, which should be 5-6 hours.
- Wrap the brisket in foil or butcher paper, then place it back into the Traeger.
- Cook for another 4 hours or thereabouts until the brisket reaches doneness at 203°F internal meat temperature, or feels like butter when poked.
- Rest the brisket for 1 hour or place in a dry cooler for up to 4 hours.
- Prior to cooking, trim the fat cap to 1/4 inch and remove the silver skin underneath the brisket.
- Apply a binder (optional) using olive oil or yellow mustard, and then season both sides of the brisket with a barbeque rub.
Nutrition Information:
Serving Size:
100Amount Per Serving: Calories: 155
Choosing The Right Brisket
- Choose a brisket wisely to impact final result
- Look for intermuscular fat for flavor, tenderness, and juiciness
- Choice and Prime grade briskets can also work well
- Carefully consider selection to ensure best outcome
Nailing the perfect brisket in your Traeger begins at the supermarket or butcher. Choosing the right brisket can make an enormous difference to the final product. You can do everything else right by applying all the techniques you’ve learned, but if you buy the wrong brisket, you’ve lost before you’ve even switched on your Traeger.
You don’t need to buy Wagu beef to get a moist, tender brisket. A Choice or a Prime grade brisket is perfectly fine, but you still need to know a few basic things when shopping. Train your eye to look for intermuscular fat on brisket because this is what will make the most difference to the flavor, the tenderness and juiciness. For more information, check out this article: Select, Choice or Prime Brisket.
Trimming Your Brisket
- Remove silver skin from underside of brisket
- Leave 1/4 inch fat cap on top to protect from drying out and assist in bark formation
- Some people remove most of fat cap for better bark, but a thin layer can still be effective
- Place fat cap towards heat source, either fat side down or fat side up
- Look for a little fat on the flat of the brisket to prevent drying out during cooking
When trimming a brisket for cooking on a Traeger, it is important to remove the silver skin from the underside of the meat. On the top side, it is recommended to leave a 1/4 inch layer of the fat cap to help protect the brisket from drying out and to assist in the formation of a good bark.
Some people choose to remove most of the fat cap in order to achieve a better bark, but leaving a thin layer of fat can still be effective. It is also suggested to place the fat cap towards the heat source, either fat side down or fat side up on the grill. Also, experts recommend looking for a little fat on the flat of the brisket to help prevent it from drying out during the cooking process.
The Best Rub For Brisket
There are many different approaches to making a brisket rub, and what works best can vary depending on personal preference and the specific flavors you want to achieve.
According to some competition pitmasters and barbecue gurus, the key to a good brisket rub is to keep it simple, using just a few high-quality ingredients that complement the natural flavor of the meat. Salt and pepper are often the base of a brisket rub, with the addition of other spices such as paprika, garlic powder, and onion powder. Some experts also recommend using a little sugar in the rub to help create a caramelized crust on the exterior of the meat.
It is important to not overdo it with the rub, as too many strong flavors can overpower the taste of the brisket itself. A light coating of the rub is often sufficient, and it is recommended to apply it evenly to ensure consistent flavor throughout the meat. Some pitmasters also recommend applying a binder, such as olive oil or yellow mustard, to help the rub adhere to the surface of the brisket.
Here is a great homemade recipe:
Standard Barbecue Rub

I found this great rub recipe through How To BBQ Right. I use this recipe and alter it slightly depending on what I'm cooking. Made by the guys at Townsend Spice & Supply: https://townsendspice.com/
Ingredients
- - ½ Cup Paprika
- - ½ Cup Salt
- - ½ Cup Sugar
- - ½ Cup Granulated Garlic
- - ¼ Cup Granulated Onion
- - ¼ Cup Chili
- - ¼ Cup Cumin
- - 2 Tablespoons Black Pepper
- - 2 Tablespoons Dry Mustard
- - 1 Tablespoon Cayenne Pepper
Instructions
- Combine all the spices together in a large mixing bowl
- Store rub in rub shakers
Franklin-Style Rub
The Texas rub is a blend of spices and seasonings used to flavor brisket and other meats. It is traditionally used in Texas-style barbecue and is known for its simple yet flavorful profile. The exact ingredients in a Texas rub can vary, but it typically consists of a combination of salt, pepper, and other spices such as paprika, garlic powder, and onion powder. Some recipes may also include brown sugar, chili powder, and other seasonings. The proportions of each ingredient can be adjusted to personal preference.
Anyone can make a Texas rub at home. All you need is some course pepper and some course salt. Mix a 50-50 amount of S&P, and spread it over your brisket. Give it at least 1 hour to work its way into the meat before putting it into your Traeger.
A simple Texas rub will highlight all the natural flavors of the smoke and the meat. Brisket master Aaron Franklin uses a simple cafe blend Black pepper with kosher salt on his brisket. If it’s good enough for Aaron, it’s good enough for me! You don’t need fancy rubs to make great barbecue. Sometimes it’s nice to just keep things simple.
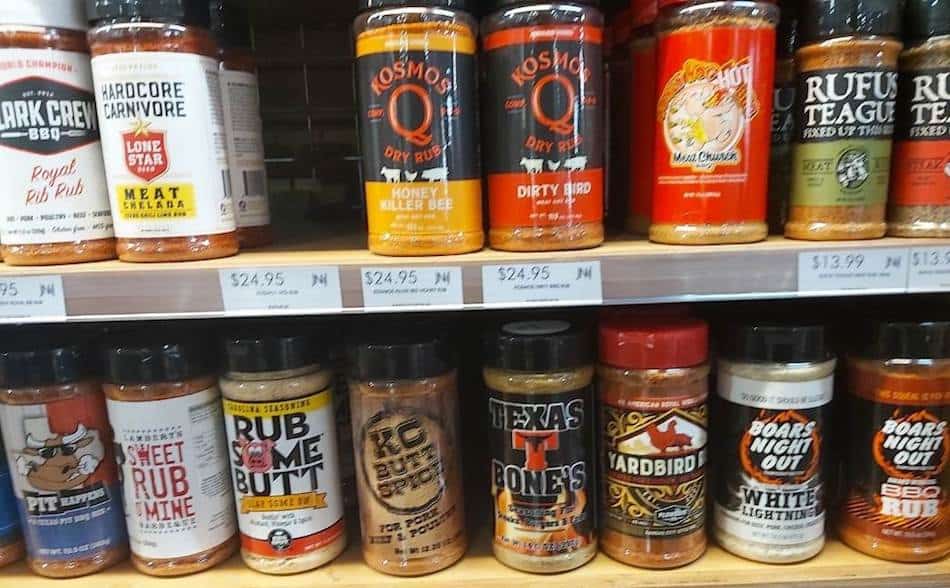
The Best Pre-Made Rubs
Amazon here.
| Rub Name | Description | Link |
|---|---|---|
| Meathead’s Rub | Homemade rub recipe from Science of Barbecue author Meathead Goldwyn | Link |
| Harry Soo’s Slap Yo Daddy Rub | Line of rubs created by multiple world brisket champion Harry Soo | Link |
| Malcolm Reed’s Killer Hogs Rub | Rub produced by barbecue guru Malcolm Reed | Link |
There are dozens of quality rubs available online, including Traeger Rubs, but making your own is easy and much cheaper if you use your Traeger regularly. If you are buying rubs, be mindful of the salt and sugar content. I’ve ruined a few briskets with salty rubs, and the main reason I make my own rub is to control the amount of salt.
Meathead’s Rub. One of my favorite homemade rub recipes is from Science of Barbecue author Meathead Goldwyn. Meathead’s Memphis Dust recipe works really well on brisket. You can find the link here.
Rubs Made By Pitmasters. There are several great rubs on the market, and we all have our favorites. These days, I prefer to make homemade rub. But I remember when I first started out, I just wanted to buy something that was ready-made and worked. And when choosing a rub, I went straight to the pitmasters themselves.
Harry Soo is a multiple world brisket champion, so I looked to hurry whenever I needed to buy a rub. Harry has a line of rubs called Slap Yo Daddy. So if you want to buy a rug but don’t know where to start, you can’t go wrong with any of Harry’s products. You can find Harry’s rubs in the Slap Yo Daddy Amazon store here.
Killer Hogs is the other store-bought rub I highly recommend, produced by barbecue Guru Malcolm Reed of YouTube fame. You can get Malcolm’s Killer Hogs Brisket Rub on Amazon here.
How To Apply The Rub To Brisket
There are several techniques and tricks that barbecue experts and competition pitmasters use when applying rub to brisket. Here are a few common approaches:
- Use a binder: Some pitmasters recommend applying a binder, such as olive oil or yellow mustard, to the surface of the brisket before applying the rub. This helps the rub adhere to the meat and creates a more even distribution of the spices.
- Apply a thin, even layer: It is important to apply the rub evenly to the surface of the brisket to ensure consistent flavor throughout the meat. Too much rub can lead to an overly salty or overpowering flavor, so it is generally recommended to use a light hand when applying the rub.
- Massage the rub into the meat: Gently massaging the rub into the surface of the meat can help it adhere better and ensure that it is well-distributed.
- Let the rub rest: After applying the rub, some pitmasters recommend letting it sit on the meat for a few hours or overnight in the refrigerator to allow the flavors to penetrate the meat. This is known as “dry brining” and can help to enhance the overall flavor of the brisket.
Rub is the flavor, the bark is the texture. To get a good bark, you need to have a good rub. It’s a critical part of the process.
Harry Soo
Do You Apply A Binder?
A binder is optional when applying your rub. You can use either olive oil, yellow mustard which seems to be the most common binders used in the world of barbecue. Simply cover the brisket with yellow mustard or olive oil, then sprinkle your rub. When the brisket is in the Traeger, the binder will help fuse the rub into the meat, which will help with the bark development. You won’t be able to taste the yellow mustard after 12 hours in the Traeger, because mustard mostly water anyway. For more information on brisket binder, check out an article I wrote a while back: Binder For Brisket?
The Best Wood For Brisket
According to competition pitmasters and barbecue gurus, brisket is a versatile cut of meat that can be smoked with a variety of wood flavors. Some common wood choices for brisket include hickory, oak, and pecan, which are known for their strong, bold flavors. Mesquite is also a popular choice in Texas, although it is a very strong-flavored wood that some people find to be bitter.
Many experts recommend mixing and matching different woods to create unique flavor profiles and to suit personal preference. For example, hickory and cherry or pecan and apple can be combined to create a pleasing blend of flavors for smoking brisket on a Traeger. The possibilities are endless, and it can be fun to experiment with different wood combinations to find the perfect balance of flavors for your taste.
| Wood Flavor | Description |
|---|---|
| Hickory | Bold, strong flavor; often used in traditional barbecue |
| Oak | Rich, robust flavor; pairs well with beef and other strong-flavored meats |
| Pecan | Mild, sweet flavor; can add a subtle nutty note to the meat |
| Mesquite | Strong, pungent flavor; popular in Texas but can be bitter to some tastes |
| Cherry | Mild, sweet flavor; adds a fruity note to the meat |
| Apple | Mild, sweet flavor; adds a subtle fruitiness to the meat |
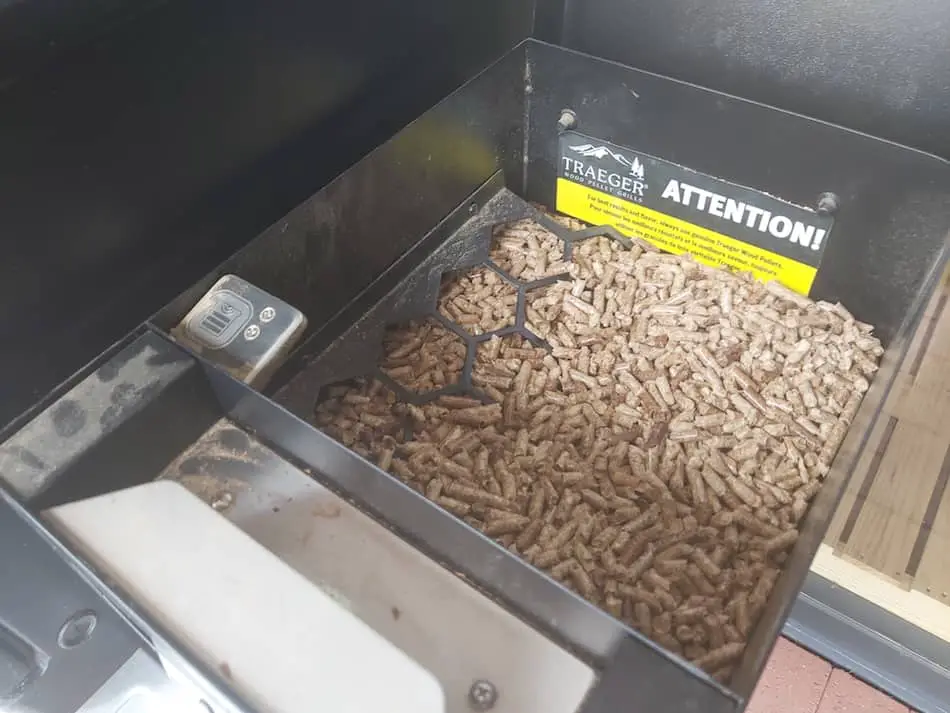
Fill the Pellet Hopper for a Brisket Cook
- Plan on a full hopper of wood pellets for a 10-12 hour brisket cook on a Traeger, or longer if needed
- Average cook time for brisket is 1 hour per pound, but can vary depending on size, thickness, and desired doneness
- Use a meat thermometer to monitor internal temperature and ensure desired level of doneness
- Wood pellet usage per hour for brisket on a Traeger can range from 1-2 pounds, depending on grill size and efficiency, and desired smoke flavor
- Consult manufacturer’s guidelines for specific wood pellet usage recommendations, and have extra on hand as needed
When smoking a brisket on a Traeger, it is important to have a sufficient supply of wood pellets to last for the entire cooking process. Brisket can take anywhere from 10 to 12 hours to cook, and in some cases even longer, so you will need a full hopper of pellets to ensure that you don’t run out halfway through the cook. This is especially important when smoking a brisket overnight, as you don’t want to risk interrupting the cooking process by having to refill the hopper in the middle of the night.
In terms of the average cook time for brisket, it can vary depending on the size and thickness of the meat, as well as the desired level of doneness. A general rule of thumb is to plan on about 1 hour of cook time per pound of brisket, but this can vary depending on the specific cooking conditions and the desired result. It is always a good idea to use a meat thermometer to monitor the internal temperature of the brisket and ensure that it is cooked to the desired level of doneness.
As for the number of pellets needed per hour for a brisket cook, this will depend on the size and efficiency of your Traeger, as well as the desired level of smoke flavor. Some Traegers may use more pellets per hour than others, so it is a good idea to consult the manufacturer’s guidelines for specific recommendations. In general, you can expect to use anywhere from 1 to 2 pounds of pellets per hour when smoking a brisket, but it is always a good idea to have extra on hand in case you need more.
The Best Temperature For Smoking Brisket?
According to competition pitmasters and barbecue gurus, the best temperature range for smoking a brisket on a Traeger is between 200°F and 275°F. Cooking the brisket within this temperature range will allow for a moist, tender, and flavorful result. Some experts recommend setting the Traeger to around 250°F for a traditional barbecue flavor, while others suggest starting at a lower temperature of 200°F for a longer cook time and a more delicate smoke flavor.
Regardless of the specific temperature chosen, it is important to monitor the internal temperature of the brisket using a meat thermometer to ensure that it is cooked to the desired level of doneness. A general rule of thumb is to aim for an internal temperature of 203°F for a well-done brisket, although some pitmasters prefer a lower temperature for a more tender result. As always, it is a good idea to consult the manufacturer’s guidelines and use your own judgment based on personal preference and experience.
| Temperature | Wrapping Stage (estimate) | Post Wrapping (estimate) | Total Cook Time (estimate) |
|---|---|---|---|
| 200°F | 8 hours | 8 hours | 16 hours |
| 220°F-250°F | 7 hours | 6-7 hours | 13-14 hours |
| 275°F | 6 hours | 4 hours | 10 hours |
Cooking Brisket at 275°F:
- Wrapping Stage: 6 hours
- Post Wrapping: 4 hours
- Total Cook Time: 10 hours
Cooking Brisket at 200°F:
- Wrapping Stage: 8 hours
- Post Wrapping: 8 hours
- Total Cook Time: 16 hours
Cooking Brisket between 220°F to 250°F:
- Wrapping Stage: 7 hours
- Post Wrapping: 5-6 hours
- Total Cook Time: 12-13 hours
When smoking a brisket on a Traeger, it is important to consider the desired level of smoke flavor and tenderness, as well as the desired cook time. For a traditional barbecue flavor and a moderate cook time, it is recommended to set the Traeger to a temperature between 220°F and 250°F.
This will typically result in a wrapping stage of 7 hours and a post-wrapping stage of 5-6 hours, for a total cook time of 12-13 hours. For a more intense smoke flavor and a longer cook time, a temperature of 200°F may be preferred, although this will result in a total cook time of 16 hours. For a quicker cook time and a slightly milder smoke flavor, a temperature of 275°F may be the best choice, resulting in a total cook time of 10 hours.
When Is It Done?
In addition to monitoring the temperature of the brisket, it is also important to pay attention to the appearance and texture of the meat. As the brisket cooks, the fat should render and the meat should become tender and easily pull apart with a fork.
Some pitmasters and barbecue enthusiasts also like to use the “toothpick test” to determine the doneness of the brisket. To do this, simply insert a toothpick or thin skewer into the brisket and see if it easily slides in and out of the meat. If the toothpick or skewer easily glides in and out of the brisket, it is likely ready to be removed from the grill. If it resists or meets resistance, it may need more time to cook.
For more on meat thermometers, check out my Thermometer Guide.
| Brisket Size | Temperature | Cook Time | Including Resting |
| 12 lbs | 225°F | 18 hours | 19 hours |
| 18 lbs | 250°F | 18 hours | 19 hours |
| 12 lbs unwrapped | 225°F | 19 hours | 20 hours |
| 18 lbs unwrapped | 250°F | 19 hours | 20 hours |
| 16 lbs | 275°F | 10 – 12 hours | 11-13 hours |
| 16 lbs unwrapped | 275°F | 11-13 hours | 12-14 hours |
Where To Place Brisket In The Pellet Grill
- To ensure that the point of the brisket cooks properly, it is recommended to place it in the hottest area of the grill.
- The point muscle contains a lot of fat and connective tissue and requires a longer cook time in order to break down these elements.
- The flat of the brisket is leaner and more prone to drying out, so it should be placed away from the heat source to protect it.
- Both the point and flat can be purchased separately and cooked individually.
When cooking a brisket on a Traeger, it is recommended to position the point, or the larger muscle of the brisket, in the hottest area of the grill. This is because the point contains a lot of fat and connective tissue which requires time to break down during the low-and-slow cooking process.
On the other hand, the flat, or the leaner end of the brisket, should be placed away from the heat source to prevent it from drying out. Some experts recommend placing the fat cap towards the heat source, either fat side down or fat side up, to help shield the flat and add moisture to the meat.
It is also possible to purchase the point and the flat separately and cook them separately, depending on the desired outcome.
Fat Side Up Or Fat Side Down?
- Many barbecue experts recommend cooking the brisket with the fat side up to help keep the meat moist and add flavor to the finished product.
- Some pitmasters argue that cooking the brisket with the fat side down allows the fat to melt and baste the meat, resulting in a more tender and flavorful finished product.
- Others recommend flipping the brisket halfway through the cooking process to take advantage of both methods.
| Pros: Fat Side Up | Cons: Fat Side Up |
| Bastes the meat (a theory) | More seasoning will drip off |
| A more beefy flavor | Less smokey flavor |
| Practiced by pitmasters Aaron Franklin and Malcom Reed. | Softer bark on meat side |
| Cooks faster (if you want a fast brisket) | More rub and seasoning will wash off |
| Cooks fast ( a con if you prefer low and slow) |
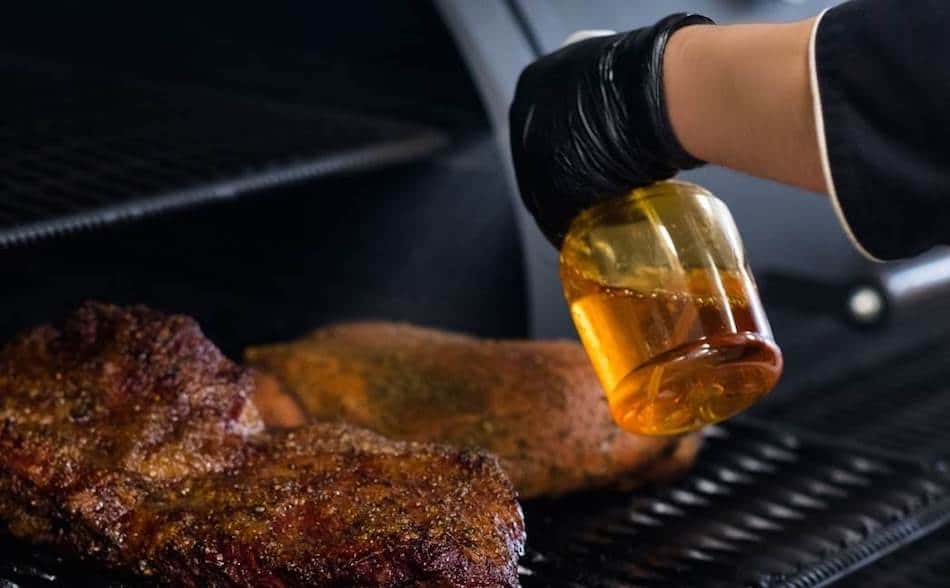
Mop or Spritz
Some barbecue experts and competition pitmasters recommend using a spritz or mop during the first 4-6 hours of cooking to help with bark formation and add moisture to the meat. Others advise against using a spritz or mop at all, as it can interfere with the formation of a good bark and may cause the grill to lose heat.
Ultimately, the decision to use a spritz is a matter of personal preference and depends on the specific goals of the cook. Some pitmasters swear by using a spritz or mop to achieve a moist and flavorful finished product, while others prefer to rely on the natural juices of the meat and the smoke from the wood pellets to add flavor and moisture to the brisket.
Examples of Spritzing Liquids:
- Apple juice
- Apple cider vinegar
- Beef broth
- Beer
- Coca Cola
- Water with Worcestershire sauce
Benefits of Spritzing:
- Keeps meat moist
- Helps form a smoke ring
- Assists with bark formation
- Can add flavor
Drawbacks of Spritzing:
- Can cause grill to lose heat
- Requires constant attention
- Can slow down cooking process
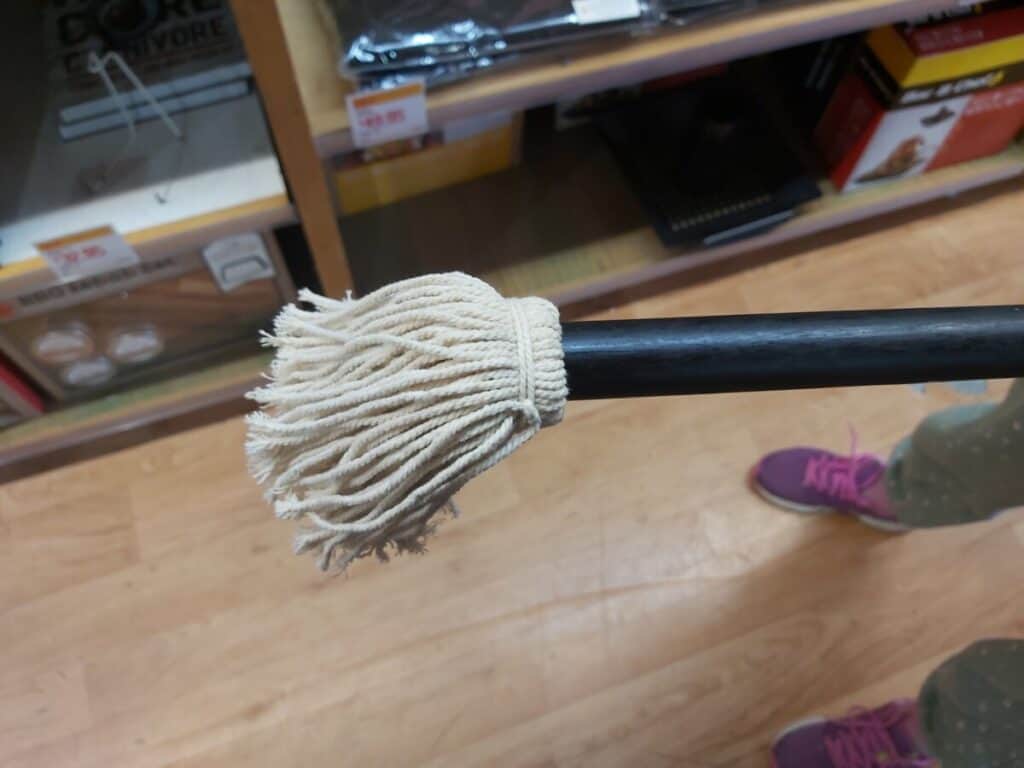
Mopping Brisket
There are various opinions among barbecue gurus, expert chefs, and competition pitmasters on the use of mopping while cooking a brisket. Some believe that mopping, or applying a liquid mixture to the surface of the meat, can help to keep the brisket moist and add flavor. Others feel that mopping is unnecessary and can actually interfere with the natural process of rendering fat and developing a good bark.
Here are a few examples of mopping recipes that have been recommended by various barbecue experts:
- Apple Cider Vinegar Mop: Combine 1 cup apple cider vinegar, 1 cup water, and 2 tablespoons Worcestershire sauce. Apply to the surface of the brisket every 30 minutes during the first 4 hours of the cook.
- Basic BBQ Mop: Combine 1 cup apple cider vinegar, 1 cup water, and 1/4 cup vegetable oil. Add 2 tablespoons of your favorite BBQ rub and mix well. Apply to the surface of the brisket every 30 minutes during the first 4 hours of the cook.
- Mustard Mop: Combine 1 cup yellow mustard, 1/2 cup apple cider vinegar, and 1/4 cup brown sugar. Apply to the surface of the brisket every 30 minutes during the first 4 hours of the cook.
- Beer Mop: Combine 1 cup beer, 1/2 cup apple cider vinegar, and 1/4 cup Worcestershire sauce. Apply to the surface of the brisket every 30 minutes during the first 4 hours of the cook.
It is important to keep in mind that mopping is not a necessary step in cooking a brisket, and the use of a mop may depend on personal preference and the desired outcome of the finished product. Some pitmasters recommend using a mop during the early stages of the cook to add moisture and flavor, but others prefer to let the meat cook without interference and rely on the natural rendering of fat and the formation of a good bark to produce a flavorful and moist brisket.
There are dozens of mop sauce recipes online, perfect for brisket. The best recipe I’ve found was from the BBQ gurus over at Amazing Ribs. Here’s a link to an awesome Texas Beef Barbeque Mop Sauce.
Wrapping Brisket
- It is important to wrap a brisket in foil or butcher paper once it reaches an internal temperature of 150°F to 165°F and has developed a good bark.
- Wrapping the brisket helps to keep it moist and tender, and can also speed up the cooking process by pushing through the stall.
- The downside of wrapping is that it can soften the bark, especially if using aluminum foil. Butcher paper is more forgiving on the bark as it allows the meat to breathe.
Wrapping a brisket in foil or butcher paper is an important step in achieving a moist, tender, and juicy meat. Once the brisket has developed a nice color and bark, it is time to wrap it, which usually takes around 8 hours if you have a full brisket.
The internal meat temperature should be in the range of 150°F to 165°F before wrapping to ensure the best results. Wrapping the brisket helps speed up the cook time and helps push through the stall, which often occurs once the meat reaches 150°F. It also prevents the meat from drying out, resulting in a juicier brisket.
However, wrapping does have the potential to soften the bark, especially when using aluminium foil. Butcher paper is a good alternative as it allows the meat to breathe and is more forgiving on the bark.
When To Wrap Brisket?
According to barbecue gurus, expert chefs, and competition pitmasters, the best time to wrap a brisket is when it has reached an internal meat temperature between 150°F and 165°F and has a firm bark with a nice color.
Wrapping the brisket is important for achieving a moist, tender, and juicy result, and it can also help speed up the cooking process and push through the stall, which typically occurs once the meat reaches 150°F. Wrapping the brisket in aluminium foil or butcher paper can both be effective methods, but foil is more readily available and cheaper, while butcher paper is a specific type of pink or peach paper that is unwaxed and allows the meat to breathe, resulting in a better bark. If you want to try butcher paper, check the latest price on Amazon.
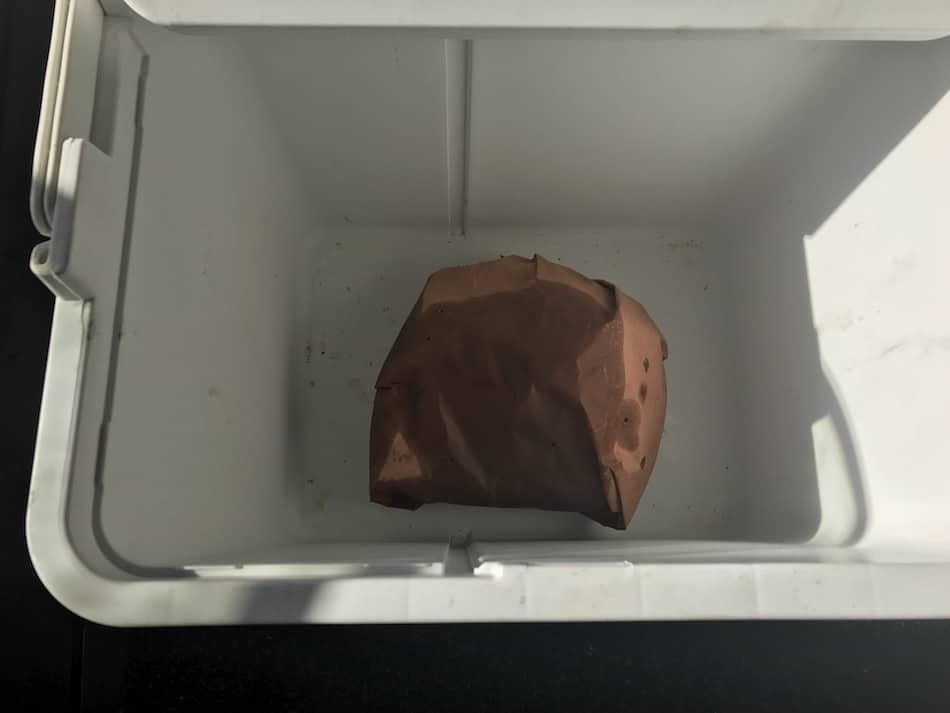
Rest Your Brisket
- Remove brisket from cooker and allow to rest for 1 hour
- Wrapping brisket in foil and placing in a dry cooler with a towel can help keep warm for several hours
- Resting allows juices to redistribute and helps prevent meat from drying out when sliced
Once you have removed your brisket from the Traeger, allow the meat to rest for about 1 hour so it can reabsorb some of its moisture. If you slice brisket too soon, the meat will dry out. If you’re not ready to serve, place the brisket into holding. To hold a brisket, leave the meat wrapped in foil and place the brisket in a dry cooler. For more insulation, wrap the meat with a towel. A brisket can stay out for well over 4 hours this way, which gives you flexibility.
According to competition pitmasters and barbecue gurus, allowing a brisket to rest after cooking is an important step in the process of preparing a perfectly cooked, moist and tender brisket. During the cooking process, the juices in the meat are forced towards the center of the brisket, and allowing the meat to rest allows these juices to be redistributed throughout the meat. This helps to prevent the meat from drying out when it is sliced and served.
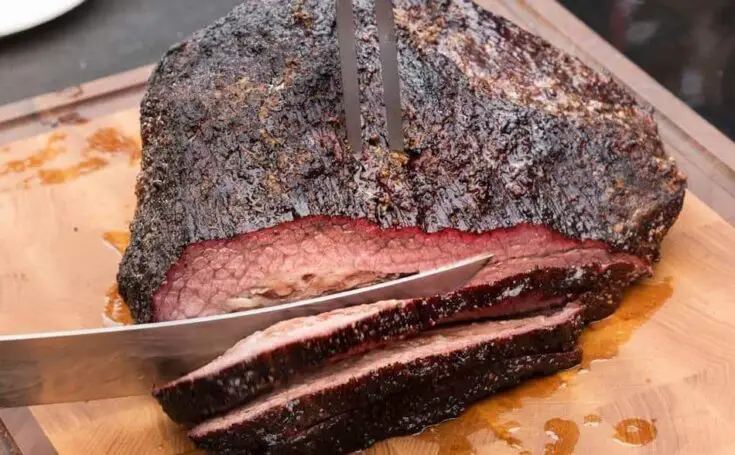
How To Slice Brisket
According to barbecue experts, slicing brisket correctly is essential for achieving optimal tenderness and flavor. Here are a few tips for slicing brisket like a pro:
- Slice against the grain: As mentioned before, slicing against the grain is essential for achieving a tender cut of meat. The grain of the meat refers to the direction in which the muscle fibers are aligned. When you slice against the grain, you are cutting across the fibers, resulting in shorter, more tender pieces. Slicing with the grain, on the other hand, will result in longer, tougher pieces.
- Separate the point from the flat: The point and the flat are the two main cuts of brisket. The grain of the meat runs in different directions in these two cuts, so it’s best to slice them separately. The flat is a leaner cut with a relatively consistent grain, so it’s easier to slice. The point, on the other hand, has a marbled texture and a more irregular grain, so it requires a bit more attention when slicing.
- Use a sharp knife: A sharp knife is essential for slicing brisket. A dull knife will require more pressure to slice through the meat, which can cause the fibers to stretch and become tougher. It’s a good idea to use a sharp, long knife when slicing brisket, as it will give you more control and precision.
- Slice the brisket thinly: Slice the brisket thinly for maximum tenderness. A common mistake is to slice the brisket too thickly, which can result in a tougher cut of meat. Aim for slices that are about 1/4 to 1/8 inch thick.
When slicing brisket, it’s essential to slice against the grain for maximum tenderness. If you slice with the grain, the meat will not be as tender. To ensure proper slicing, it’s best to separate the point from the flat and slice them individually as the grain of the meat runs in different directions. Paying attention to the grain of the meat is a key factor in achieving perfectly sliced, tender brisket. Experts agree that slicing against the grain is the best method for achieving optimal tenderness.
Injecting: For Next-Level Brisket
- Injecting a brisket can add flavor and moisture
- Injections can help to keep the meat moist and flavorful during cooking
- Injecting can make a big difference in the final product
- Flavorful injection mixtures can enhance the taste of the meat
- Simple technique that can take your brisket to the next level
Barbecue experts and competition pitmasters recommend injecting a brisket as a way to add flavor and moisture to the meat. Injections can help keep the meat moist and flavorful during the cooking process, and they can make a big difference in the final product. Some popular injection mixtures include a mix of beef broth, apple juice, and Worcestershire sauce, or a mixture of beef broth, apple cider vinegar, and garlic. Injecting a brisket is a simple but effective technique that can enhance the taste and texture of the meat.
For competition style brisket, consider injecting the meat for a huge flavor boost and some extra moisture. You can use bone broth or buy a competition-winning formula online.
Hot-And-Fast Brisket
If you need a brisket in a hurry, why not try a hot-and-fast brisket. A fast brisket has become a bit of a trend in the barbeque world. A hot-and-fast brisket is cooked at 400°F and has a total cook time of 3.5 hours.
Set the temperature of your Traeger to 400°F and cook for 90 minutes. By this stage, the brisket should have an internal meat temperature between 165°F and 175°F. Wrap the brisket, then put it back into the Traeger for another 2 hours. Once it reaches 203°F, it’s done. It’s very important to mop/spritz your hot and fast brisket every 30 minutes.
A hot-and-fast brisket will not taste as smokey, won’t be as tender and juicy, won’t have a crispy bark, and will be more chewy. However, it’s still good-tasting brisket and having it ready in under 4 hours is mind-blowing.
The Overnight Brisket
If you are smoking a brisket overnight, you want the temperature just below 200°F. Place the brisket in the Traeger before you go to bed and leave it for about 8 hours until the wrapping stage. Once you’ve wrapped the meat in the morning, you can leave the temperature at 200°F, but it will probably take another 8 hours to reach 203°F internal. If you want the brisket done a little faster, after wrapping, increase the temperature of your Traeger up to 220°F to 250°F.
Increasing the temperature should only take another 5 hours to reach the 203°F internal temperature. Cooking meat overnight carries some risks, so take precautions. Traeger grills are set-and-forget grills, but issues can arise. One of my pellet grills had a back burn in the hopper, so I was glad to be around to switch it off. Sleep with a remote thermometer by your bedside, or a smart device with the Traeger App so you can track the temperature of your grill.
My Favorite Brisket Tools
Thanks for checking out this article. I hope you learned a few things. Here are some of my favorite tools I use when smoking brisket that may be useful to you. These are affiliate links, so if you decide to purchase any of these products, I’ll earn a commission. But in all honesty, these are the tools I recommend to my family and friends who are just starting out.
Meat Injector: Injecting meat is a great way to take your barbecue to the next level and help you make competition-style brisket. An injector is the only way you will be able to get flavor and moisture into the middle of the meat. The Beast Injector is a stainless steel injector that is sturdy and affordable. Check the latest price on Amazon here.
Brisket Marinade: The best injection solution on the market is the Butcher BBQ Brisket Injection. This marinade is used in competitions and is made by World Barbecue Champion pitmaster, Dave Bouska. You can find the marinade on Amazon here.
Butcher Paper: Wrapping brisket in butcher paper has become a huge trend in barbeque thanks to Aaron Franklin. Wrapping your brisket in paper will give you a nice brisket bark. However, you can’t just use any old paper, it has to be unwaxed, food grade paper. You can find it on Amazon here.
Brisket Rub: These days I make my own rub when possible, but I always have a few pre-made rubs for when I’m running low. Barbecue guru Malcom Reed produces Killer Hogs, one of the best brisket rubs I’ve found over the years. Another great rub is Slap Yo Daddy, made by brisket master and multiple World Barbecue Champion, Harry Soo.
Meat Thermometer: There are dozens of fancy thermometers on the market, but I still use my trusty TP20. For around $50, I have a high-quality meat thermometer with two probes, and can track the temperature of my smoker with one probe, and my meat with the other probe. The ThermoPro TP20 is an Amazon Best Seller because it’s the easiest thermometer to operate, is durable, highly accurate, and comes with pre-programmed meat settings.
Instant Read Thermometer: Arguably, the second most important tool you need is a fast and accurate instant-read thermometer. These tools play an important role in the latter stages of the cook when the meat needs regular checking in multiple areas. I use the ThermoPro TP19 because it can do everything a ThermaPen can do, but for a fraction of the cost. You can check out the TP19 on Amazon here.
Advanced Thermometer and Automatic Temperature Controller: Once you’re ready to take things seriously, the FireBoard 2 Drive is a six-channel Bluetooth/Wi-Fi thermometer that can monitor up to 6 pieces of meat, control and graph your cook sessions on your smartphone, and attaches to an an automatic blower that will convert your charcoal smoker to a set-and-forget. This is one of the most advanced meat thermometers on the market. You can check it out on the FireBoard website here.