A common problem people face is serving a brisket fresh for a lunch gathering. A brisket for dinner isn’t a problem because you can start the cook in the morning, but how do you get a brisket ready for lunch? Smoking a brisket is a marathon effort and a large packer can take 15 hours to cook, which can be a time-management challenge. The lunch brisket dilemma has led many to consider partially cooking the brisket the day before. I wanted to find out if smoking a brisket in two sessions can still result in tender, juicy meat.
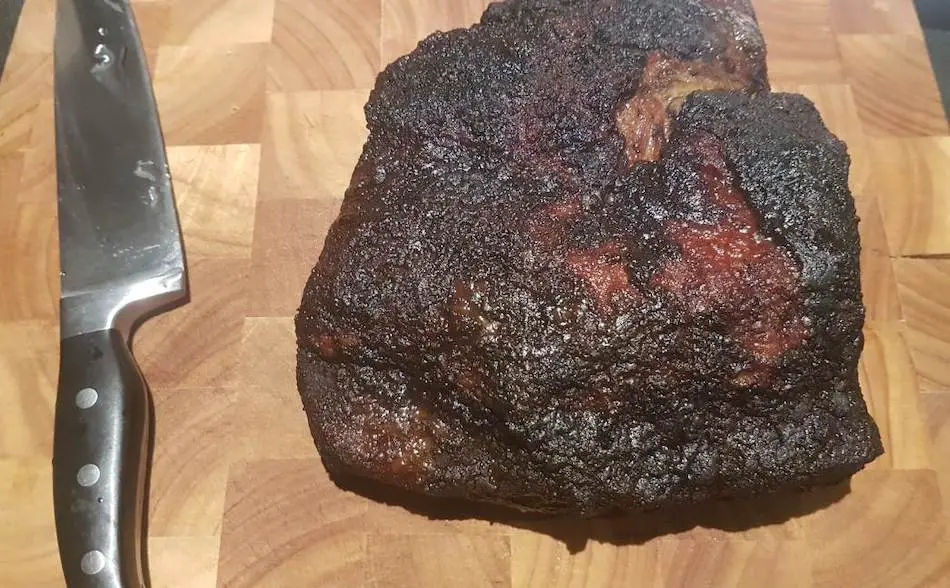
A brisket can be fully cooked or partially cooked the day before and served the following day, however much of the moisture will be lost and the bark will have softened. The overnight cook is the best option if you need a brisket served for lunch. A freshly smoked brisket will be tender and juicy if cooked correctly, but much of the moisture will have evaporated on a partial or fully cooked brisket the day before.
Key Points
- A brisket can be fully cooked or partially cooked the day before and served the following day, however much of the moisture will be lost and the bark will have softened.
- The overnight cook is the best option if you need a brisket served for lunch.
- A freshly smoked brisket will be tender and juicy if cooked correctly, but much of the moisture will have evaporated on a partial or fully cooked brisket the day before.
- Depending on the size of the roast, a brisket can take anywhere from 10 to 15 hours to cook.
- On top of that, you need to allow at least another 2-hours of resting.
- To smoke a brisket by following the ideal techniques it would need an overnight cook.
- A common problem people face is serving a brisket fresh for a lunch gathering.
- Smoking a brisket is a marathon effort and a large packer can take 15 hours to cook, which can be a time-management challenge.
- The lunch brisket dilemma has led many to consider partially cooking the brisket the day before.
- Four choices to have your brisket ready for lunchtime : Completely cook the brisket the day before and then slowly reheat the brisket the next day,Partially cook the brisket the day before and then finish the following day,Do an overnight cook with no intervention,Go to bed once the brisket is wrapped in foil, then wake up early to place the brisket into the holding phase.
- Meat served fresh out of the smoker will still have all its meat juices, whereas the next day, most of the moisture will have gone.
- The other downside is a soft bark.
- Leaving your smoker unattended while you sleep is a safety risk depending on your smoker.
| Technique | Description |
|---|---|
| Completely cook the brisket the day before and then slowly reheat the brisket the next day | Brisket is fully cooked the day before and reheated on the day of serving. |
| Partially cook the brisket the day before and then finish the following day | Brisket is partially cooked the day before and finished on the day of serving. |
| Do an overnight cook with no intervention | Brisket is cooked overnight with no additional steps taken the following day. |
| Go to bed once the brisket is wrapped in foil, then wake up early to place the brisket into the holding phase | Brisket is wrapped in foil overnight and placed into the holding phase the following day. |
Have you seen the most advanced thermometer on the market? FireBoard can be controlled via your phone, holds meat 6 probes, and records your cook data on a cloud.
The Lunch Dilemma – Brisket Time Management
Brisket isn’t a set-and-forget roast, it requires hourly spritzing and the fire management is crucial if you are using a charcoal or wood smoker. A dry brisket is what are trying to avoid at all costs, so everything we do from temperature control, to the mopping, wrapping and the resting is all to prevent moisture loss.
Depending on the size of the roast, a brisket can take anywhere from 10 to 15 hours to cook. On top of that, you need to allow at least another 2-hours of resting. So if you want to be carving the brisket at lunchtime, that means you will need to do an overnight cook if you want a tender, juicy brisket served to your guests at noon. If you were to do an overnight brisket and follow all the correct techniques, it would look something like this:
- 8pm– Fire up your smoker and stabilize the temperature at 225°F.
- 9pm– Place brisket in the smoker. Mop/spritz the meat every hour until wrapping.
- 3am – Wrap brisket in foil once the internal meat temperature is 150°F and a hard bark has developed.
- 9am– Remove brisket from smoker or oven and wrap in a towel (A brisket can remain hot for up to 4-hours if rested correctly by wrapping in a towel and placed in a dry cooler).
- 12pm – Unwrap the brisket and carve.
So unless you stay awake all night, it’s going to be difficult to smoke a brisket by following the ideal techniques we normally practice. However, you can change the way you cook a brisket overnight. If you need to have your brisket ready for lunchtime, you have four choices:
1. Completely cook the brisket the day before and then slowly reheat the brisket the next day.
2. Partially cook the brisket the day before and then finish the following day.
3. Do an overnight cook with no intervention.
4. Go to bed once the brisket is wrapped in foil, then wake up early to place the brisket into the holding phase.
Cook Today and Serve Tomorrow?
No matter what technique you try, a brisket served the next day will never taste as good as fresh brisket. If you need your brisket served for lunch, then your best option is to do an overnight cook. Meat served fresh out of the smoker will still have all its meat juices, whereas the next day, most of the moisture will have gone. The other downside is a soft bark. We spend so much time developing the bark, but if the brisket is allowed to cool in the refrigerator, the bark will soften.
This brisket injection marinade is the secret used in competitions and made by a World Barbecue champion.
The Overnight Cook
Many people will at least get the brisket to the wrapping stage before going to bed. Once the brisket is wrapped in foil or butcher paper, then you can relax a little more because there isn’t much to do other than monitor the internal meat temperature and smoker temperature. You will need a good digital thermometer that will alert you if the meat has reached the ideal internal temperature or if your smoker has exceeded the cooking temperature.
The Dangers of Overnight Cooks
Leaving your smoker unattended while you sleep is a safety risk depending on your smoker. Pellet grills are relatively safe but issues with the hopper can cause excess smoke, and there are stories of hoppers catching fire. Charcoal smokers are the most dangerous because a sudden gust of wind or a grease fire can send the temperature soaring. Grease fires are not uncommon and can occur if your smoker hasn’t been cleaned properly, or if the meat is dripping directly onto the fire. If you were to attempt an overnight cook, make sure your smoker is thoroughly cleaned and a drip pan is in place. If you have a good remote thermometer, sleep with it beside your bed so it will alarm if there is a problem. If you want to learn more about safety, I’ve written another article “Can You Leave Your Smoker Unattended?”. If you want to know which thermometers are the best for monitoring a brisket, check out my Complete Guide to Meat Thermometers.
| Brisket Total Cook Time | Start Time | Begin Spritzing | Wrap Brisket | Finish in Oven | Done Time (203°F) | Holding Time In Dry Cooler (1-4 hours) |
| 12 hours | 6pm | 9pm | 12am | 12am | 6am | Between 7am – 10am |
| 15 hours | 5pm | 8pm | 11pm | 11pm | 8am | Between 9am – 12pm |
| 18 hours | 2pm | 5pm | 8pm | 8pm | 8am | Between 9am- 12pm |
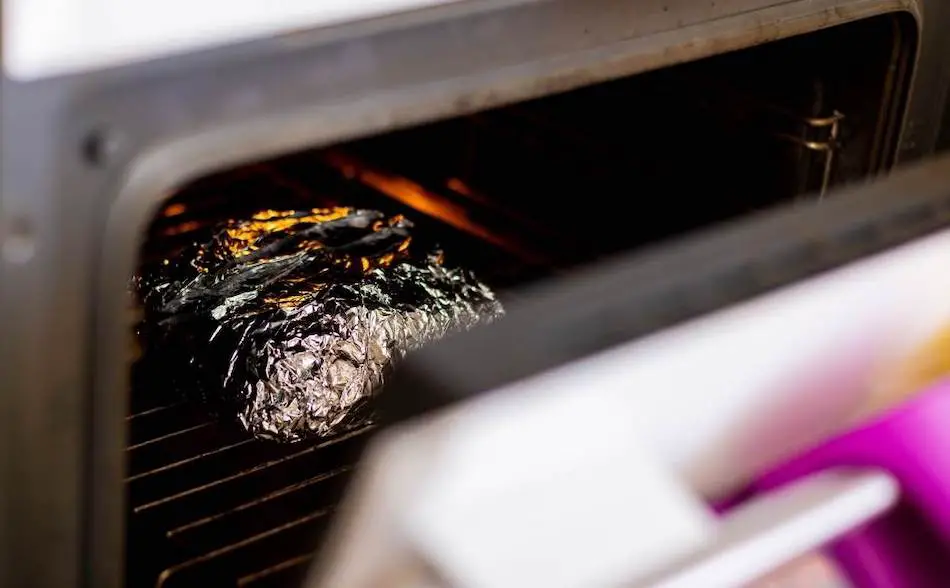
Finish Your Brisket In The Oven
Many people leave their smokers going all night, but this is a dangerous practice. If you want to have a peaceful sleep, it’s far safer to finish the brisket in a conventional oven. To do this, smoke the brisket in your smoker as you normally would. Once the brisket has reached the wrapping stage, shut down your smoker and bring the brisket inside. Before placing the brisket in the oven, insert a leave-in thermometer into the meat to alert you once the meat is done.
Finishing your brisket in the oven will take nothing away from the taste. We develop most of the flavor during the first few hours of the cook, so by the time you wrap the brisket in foil, the meat would have already taken on 5-8 hours of smoke and the bark will be hard. The goal of the last phase of the cook is getting the brisket close to a 200°F internal meat temperature without drying out the meat. For an in-depth look at finishing a brisket in the oven, check out another article I have written called Can You Finish a Brisket in the Oven?
An Overnight Cook With No Intervention
Another option is to cook your brisket in the smoker overnight with no intervention. By choosing this option, you will skip some important steps such as mopping, topping up wood, refilling the water pan and flipping the brisket. These techniques that are important for bark development, regulating temperature and keeping the meat moist.
An overnight brisket with no intervention is not the ideal way of cooking such an enormous chunk of meat, but it is probably your best option if you want to serve fresh brisket for lunch. If you go down this path, you will need to get everything else right. Make sure you select meat with nice marbling, because the fatty striations within the meat will keep it moist during the long cook. Also, consider brining and injecting the brisket prior to smoking. A brine will help the meat retain moisture during the cook and injecting extra liquid into the meat will also help replace any lost juices.
If you don’t have a meat injectors, you can get one for about $30 on Amazon: Simple Meat Injectors.
The Brisket in Two Stages
The brisket time management dilemma is a common question on the meat smoking forums. There are several experienced pitmasters who sometimes cook their brisket in two stages so it can be ready for a noon lunch. A common strategy is to take the brisket to a 140°F internal meat temperature the day before, and continue the cook the next day and take the brisket to 200°F. The two-part cook isn’t as good as freshly cooked brisket, but it is still better than brisket leftovers.
The Brisket on Ice Method
I have heard of another technique that partially cooks the brisket the day before. This method is used by some barbeque competitors, and although I haven’t tried it, some say it works well and the results are close to a fresh brisket. The method involves partially cooking the brisket at about 300° for about 4-hours before double-wrapping in foil. The brisket is then put into a garbage bag and then placed into a cooler underneath ice. Then in the morning, the brisket goes back into the smoker or oven at 300°F for 4-hours or until the internal temperature reaches 203°F. For a hardened bark, place the brisket onto the grill for 10 minutes. I haven’t tried this method, but it’s worth experimenting.
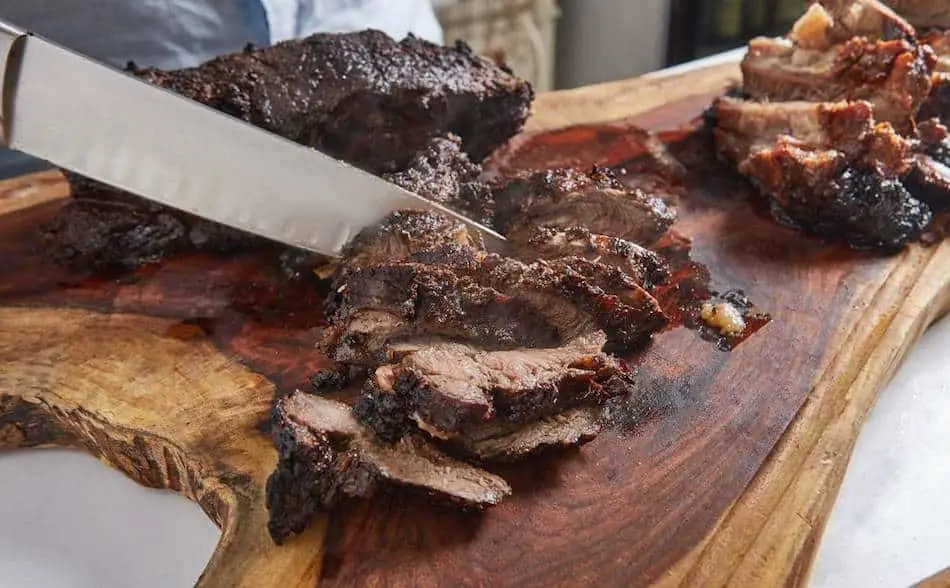
Don’t Slice Too Early
The moment you slice brisket it will dry out. Always slice just before serving and retain as much moisture as possible. If juices spill out while you are slicing the brisket, try to preserve as much liquid as possible and pour it back onto the slices. There is a specially designed cutting board on the market designed to catch all the liquid after slicing. Some pitmasters smoke brisket in an aluminium pan to catch all the meat juices and reserve for later on. After slicing, pour the meat juices onto the brisket slices.
Reheating Brisket
If you choose to cook the brisket the day before and serve the following day, the meat will be dry, but there are some things you can do to minimize moisture loss. As soon as the meat comes out of the smoker, wrap a double layer of foil around the brisket. Then wrap the meat in a towel and allow it to rest in a dry cooler for 2-4 hours before refrigeration. The following day, slowly reheat the brisket in the oven with the wrapping intact. Set your oven to 300°F until the internal meat temperature reaches 140°F – 145°F and then slice and serve.
Some people find microwaving brisket slices will bring some of the moisture back into the meat, especially if you add some bone broth or some barbeque sauce. The other option is to reheat the brisket on the stove in a pot. If you place a lid on the pot, the steam will add some moisture to the meat so it won’t taste as dry.
World Brisket Champion Harry Soo is now sharing his secrets with his Competition Meat Rubs.
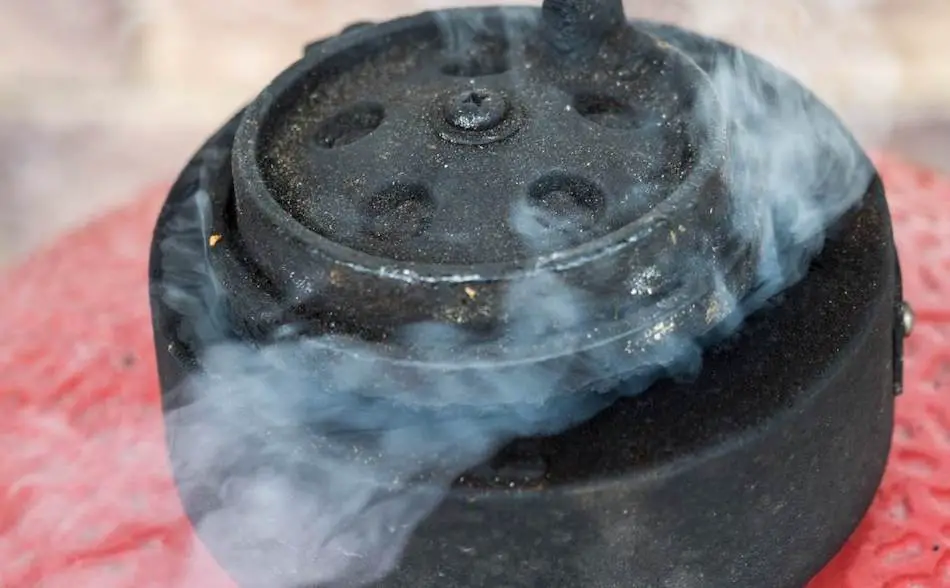
Set-and-Forget Smokers – Safe For Overnight Cooks
If you want to cook briskets overnight, the safest smoker is one of the set-and-forget smokers. Charcoal makes meat taste delicious, but managing a fire is time-consuming, and if you are leaving your smoker unattended, it can be dangerous.
Electric Smokers
Electric smokers are the best set-and-forget smokers on the market, and the best smoker for overnight briskets. Electric smokers are as simple to use as a conventional oven, so you can put a brisket on before bed knowing the chances of something happening are very slim. Although electric smokers are easy to use, the meat doesn’t taste as good because meat always tastes better cooked with fire.
Gas Smokers
The other alternative is a gas smoker. Gas smokers are as easy to operate as an electric, but the meat tastes better. The issue with gas smokers is the need for propane, which can run out if you are using the small bottles. Since brisket requires 10 to 15 hours of cooking time, the risk with propane is you will run out part way through the cook. If you can connect your barbeque and smoker to the natural gas in your home, then you will avoid this problem.
Pellet Smokers
Pellet smokers produce the best tasting meat when comparing set-and-forget smokers, and many people do overnight briskets on these kinds of smokers. Pellet grills are simple to use; all you need to do is fill the hopper with wood pellets and set the temperature. The wood pellets burn in the fire pot and provide the brisket with a steady flow of smoke for the entire cook.
If you want to lean more about set-and-forget smokers, I have written several articles that go not more detail. For electric smokers, check out Are Electric Smokers Any Good? If you want to learn more about gas smokers, you might be interested in Gas Smokers.
My Favorite Brisket Tools
Thanks for checking out this article. I hope you learned a few things. Here are some of my favorite tools I use when smoking brisket that may be useful to you. These are affiliate links, so if you decide to purchase any of these products, I’ll earn a commission. But in all honesty, these are the tools I recommend to my family and friends who are just starting out.
Meat Injector: Injecting meat is a great way to take your barbecue to the next level and help you make competition-style brisket. An injector is the only way you will be able to get flavor and moisture into the middle of the meat. The Beast Injector is a stainless steel injector that is sturdy and affordable. Check the latest price on Amazon here.
Brisket Marinade: The best injection solution on the market is the Butcher BBQ Brisket Injection. This marinade is used in competitions and is made by World Barbecue Champion pitmaster, Dave Bouska. You can find the marinade on Amazon here.
Butcher Paper: Wrapping brisket in butcher paper has become a huge trend in barbeque thanks to Aaron Franklin. Wrapping your brisket in paper will give you a nice brisket bark. However, you can’t just use any old paper, it has to be unwaxed, food grade paper. You can find it on Amazon here.
Brisket Rub: These days I make my own rub when possible, but I always have a few pre-made rubs for when I’m running low. Barbecue guru Malcom Reed produces Killer Hogs, one of the best brisket rubs I’ve found over the years. Another great rub is Slap Yo Daddy, made by brisket master and multiple World Barbecue Champion, Harry Soo.
Meat Thermometer: There are dozens of fancy thermometers on the market, but I still use my trusty TP20. For around $50, I have a high-quality meat thermometer with two probes, and can track the temperature of my smoker with one probe, and my meat with the other probe. The ThermoPro TP20 is an Amazon Best Seller because it’s the easiest thermometer to operate, is durable, highly accurate, and comes with pre-programmed meat settings.
Instant Read Thermometer: Arguably, the second most important tool you need is a fast and accurate instant-read thermometer. These tools play an important role in the latter stages of the cook when the meat needs regular checking in multiple areas. I use the ThermoPro TP19 because it can do everything a ThermaPen can do, but for a fraction of the cost. You can check out the TP19 on Amazon here.
Advanced Thermometer and Automatic Temperature Controller: Once you’re ready to take things seriously, the FireBoard 2 Drive is a six-channel Bluetooth/Wi-Fi thermometer that can monitor up to 6 pieces of meat, control and graph your cook sessions on your smartphone, and attaches to an an automatic blower that will convert your charcoal smoker to a set-and-forget. This is one of the most advanced meat thermometers on the market. You can check it out on the FireBoard website here.