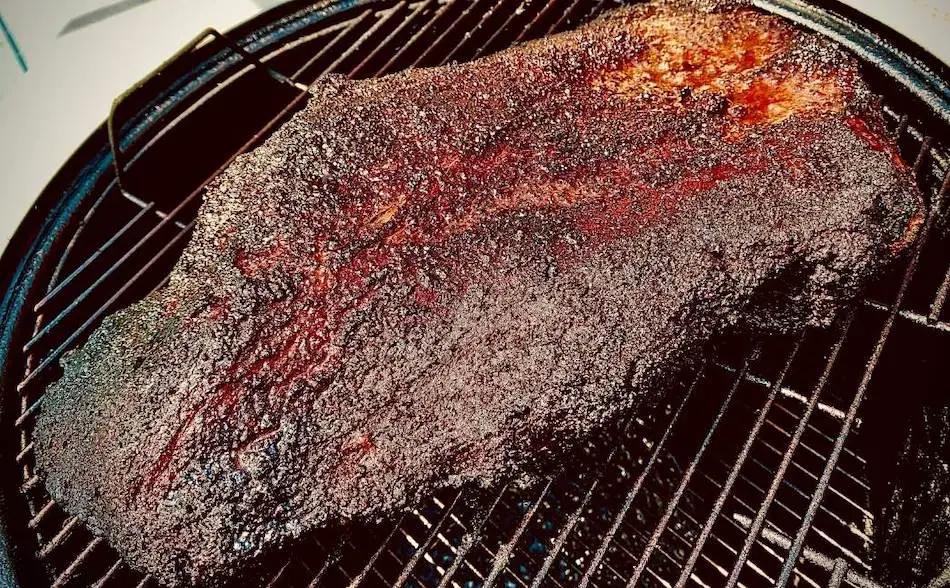
If you’re looking to cook a brisket in less time, the hot-and-fast method may be the way to go. While the traditional low-and-slow method can take upwards of 12 hours on a kettle grill, the hot-and-fast method allows you to cut that cooking time in half. At first, I was skeptical about whether this method would produce the same delicious, smoky flavors as the traditional method. But after trying it for myself, I was surprised how good it actually turned out. In this article, I’ll share my experience with the hot-and-fast method, including the meat preparation and setup of my Weber grill.
To cook a hot and fast brisket, aim for a temperature around 350-375°F on your grill. Light 60 coals and place 100 unlit coals in the Weber, then adjust the top and bottom vents to 1/2. Insert a thermometer into the brisket and wrap in foil once it reaches 160°F or has developed a bark. Cook to at least 190-205°F and rest for 30 minutes before serving.
Target Temperature for Hot and Fast Brisket Smoking
- Cook brisket hot and fast at 350-375°F
- Light 60 coals and place 100 unlit coals in the Weber
- Adjust the top and bottom vents to 1/2
- Insert a thermometer into the brisket
- Wrap in foil once the brisket reaches 160°F or bark is developed.
- Cook to at least 190-205°F
- Rest for 30 minutes
Don’t Expect Perfection
It is important to remember that when smoking brisket using the hot and fast method, the goal is to have a finished product in half the time, not to achieve the same level of perfection as with low and slow cooking. While the hot and fast brisket will still taste like a smoked brisket, it may not be as tender as one that was cooked low and slow. The point section of the brisket, in particular, may be chewier due to the high amount of connective tissue that needs time to break down at lower temperatures. Despite this, the hot and fast method can still produce a tasty and flavorful brisket in a shorter amount of time.
Cook Time for Hot and Fast Brisket Smoking
It’s important to keep in mind that cooking times will vary depending on the size and thickness of the brisket, as well as the specific heat and temperature of the grill. It’s a good idea to use a meat thermometer to ensure that the brisket is cooked to the desired temperature, rather than relying on a set cook time.
Also, be prepared to add more charcoal or adjust the temperature as needed to maintain a steady cooking temperature throughout the process.
Pros and Cons of Smoking Brisket Hot and Fast
- Quicker cooking time
- Can be done on a small scale
Cons of Hot and Fast Brisket
- May result in a less tender and juicy final product
- Will not have as much flavor as a low and slow cooked brisket
- May lose moisture during the cooking process
The obvious advantage of a hot and fast brisket is the cooking time, but the tradeoff is the quality of the final product. A low and slow brisket will have more flavor simply because it spends more time in the smoker absorbing smoke. The other downside of a hot and fast brisket is the meat will not be as tender and juicy. Brisket has a lot of connective tissue that needs time to break down. When cooked hot and fast, the brisket will lose moisture.
How to Set Up Your Weber for a Hot-and-Fast Cook
When smoking a brisket using the hot and fast method, you can use either charcoal briquettes or lump charcoal. Lump charcoal burns hotter than briquettes, so it may be a better choice for cooking at high temperatures. You will need more charcoal than usual to maintain a high cooking temperature.
To cook the brisket using indirect heat, you can either place the meat in the middle of the grill with charcoal on both sides, or place the charcoal on one side of the grill and the meat on the other.
To light the grill, use a chimney starter to pre-light a full chimney of charcoal, and then place half the lit coals on each side of the unlit coals. Keep an eye on the temperature throughout the cook and add more charcoal if necessary, or use a full charcoal starter to boost the temperature quickly if it drops significantly.
How Much Charcoal Do You Need?
If you’re setting up for a 350°F cook, you can expect the grill to take about 20 minutes to stabilize and approximately 2-2.5 hours of cook time. You should start with 60 hot coals and have a fuel supply of 100. You should set the top vent to 1/2 open and the bottom vent to 1/2-3/4 open.
When setting up your coal for a 400°F cook, you can expect the grill to take about 20 minutes to stabilize and approximately 2 hours of cook time. You should start with 70 hot coals and have a fuel supply of 120. You should set the top vent to 1/2-3/4 open and the bottom vent fully open. The brand of charcoal you are using is also Kingsford Original Briquettes.
Keep in mind that these are just general guidelines and the actual cooking time and temperature may vary depending size of the kettle grill, the amount of food you are cooking, and the weather. Use a good meat thermometer to ensure that your food is cooked to the desired temperature.
| Target Temp | Pre-lit Coal | Unlit Coal | Cook Time | Top Vent | Bottom Vent |
|---|---|---|---|---|---|
| 350°F (177°C) | 60 | 100 | 2 – 2.5 hrs | 1/2 | 1/2 – 3/4 |
| 400°F (204°C) | 70 | 120 | 2 hrs | 1/2 – 3/4 | Open |
10 Tips For Cooking Brisket Hot-and-Fast
When cooking brisket using the hot and fast method, it’s important to get everything else right in order to minimize the risk of drying out the meat. When cooking brisket using the hot and fast method, it’s important to use a well-marbled brisket, pre-brine the meat, inject it with marinade or other liquids, spritz or mop it during cooking, wrap it in foil or butcher paper, place the fat side towards the heat source, leave some fat on the fat cap, and allow the meat to rest properly after cooking. These techniques will help keep the meat moist, protect it from high heat, add flavor, and let it reabsorb its juices. By getting everything else right, you can ensure that your brisket turns out juicy and tender, even when cooking at high temperatures.
| Tip | Description |
|---|---|
| Use a well-marbled brisket | The fat will help keep the meat moist and lubricated |
| Pre-brine the brisket | Rub the meat with kosher salt to add flavor and help retain moisture during cooking |
| Inject the brisket with liquid | Add moisture deep inside the meat and replace any lost liquid with marinade, stock, or another liquid |
| Spritz or mop the brisket | Protect the edges from burning, create steam, and replace lost moisture during cooking |
| Wrap the brisket | Create steam, keep the meat moist, and protect the edges from burning by wrapping in foil or butcher paper |
| Place fat side towards heat source | Let the fat cap absorb the heat and shield the meat from drying out |
| Don’t trim too much fat | Leave some fat on the fat cap to protect the meat from high heat and drying out |
| Allow the brisket to rest | Let the meat reabsorb its juices and prevent it from drying out after cooking |
| Use a water pan | Add moisture and maintain a steady temperature of 350°F to 375°F by using a water pan in the cooking environment |
| Place brisket fat side down | Use a Weber kettle grill and place the brisket fat side down to protect the meat from high heat |
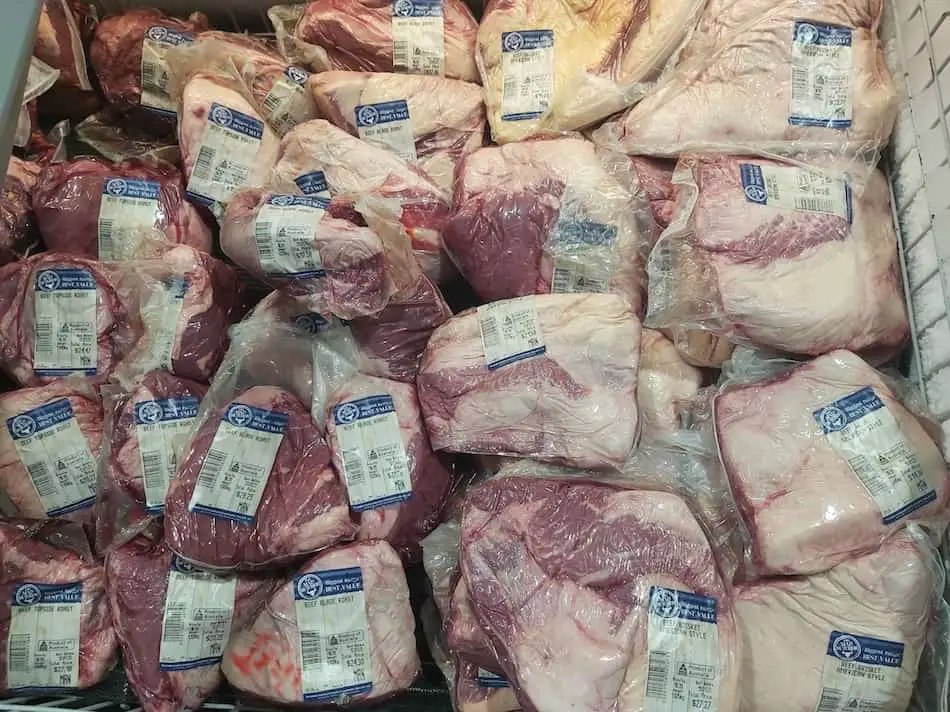
Step 1: Buy a Fatty Brisket
When cooking brisket hot and fast, it is especially important to have a well-marbled or fatty brisket to minimize the risk of the meat drying out. The fat in the brisket will help keep the meat moist and lubricated, ensuring it stays juicy and tender during the cooking process. Additionally, the fat will help protect the meat from the high heat, shielding it from drying out or burning. Finally, the fat will add flavor to the meat, making it more delicious and enjoyable to eat.
Using a well-marbled brisket or one with a good amount of fat is important when cooking hot and fast because:
- The fat will help keep the meat moist and lubricated, preventing it from drying out during the cooking process
- The fat will help protect the meat from the high heat, shielding it from drying out or burning
- The fat will add flavor to the meat and make it more juicy and tender
Step 2: Trim the Brisket Correctly
- Trim most of the fat off the top cap, but leave about 1/4 inch for insulation and to help develop the bark
- Leave some fat on the underside of the brisket, especially near the flat
- Remove the silver skin on the underside of the brisket
It is important to trim the fat on a hot and fast brisket cook because the fat helps to insulate the meat and protect it from the high heat. However, if you trim too much fat, the brisket may dry out and the bark may not develop properly. On the other hand, leaving too much fat on the brisket may prevent it from rendering and lead to a less desirable bark. Trimming the right amount of fat and removing the silver skin will help ensure that the brisket turns out moist and flavorful with a well-developed bark.
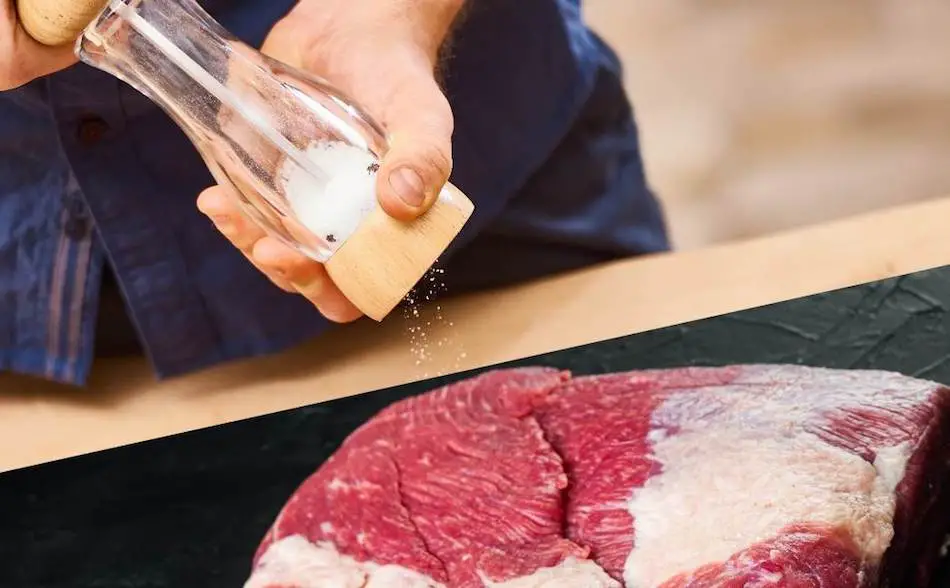
Step 3: Dry Brining Helps the Brisket Retain Moisture
- Dry brining helps retain moisture in brisket while cooking hot and fast
- Sprinkle kosher or sea salt on brisket and allow to penetrate for several hours or overnight
- Salt also adds extra flavor to the meat
Dry brining is a simple yet effective way to add flavor and moisture to your brisket before cooking. The salt helps to draw moisture out of the meat and then gets absorbed back in, creating a more flavorful and moist final product. This is especially important when cooking hot and fast, as the high heat can cause the meat to dry out more easily. By pre-treating the meat with a dry brine, you can ensure that your brisket stays juicy and flavorful even with the shorter cooking time. Just be sure to give the salt enough time to work its magic before you start cooking, as this will give the best results. For more on brining, check out Should I Brine Brisket?
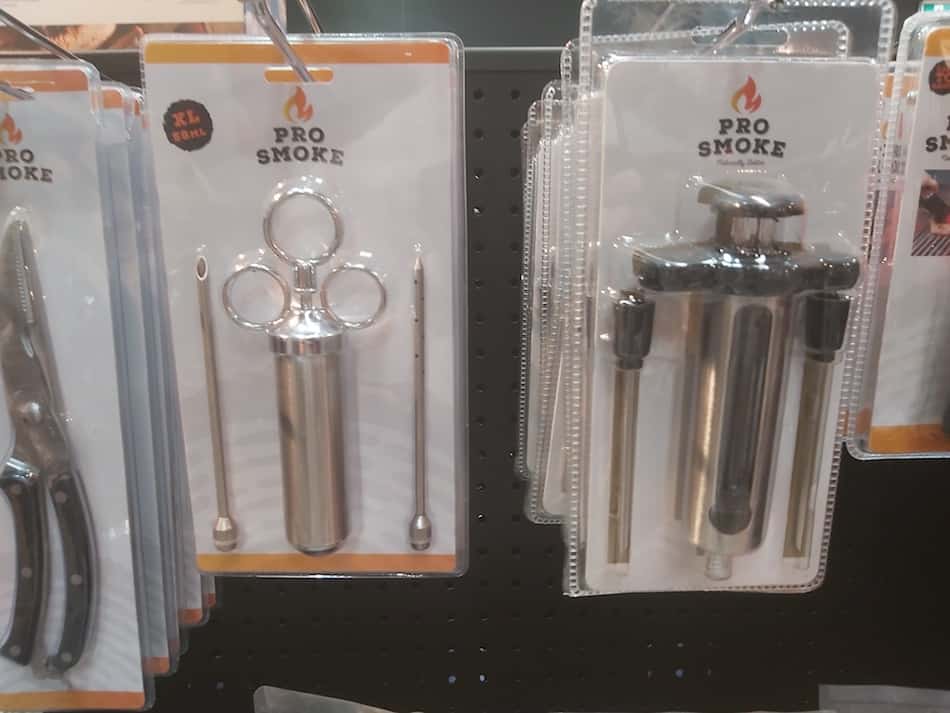
Step 4: Injecting the Brisket for Extra Moisture and Flavor
- Injecting the brisket with liquid can help to add moisture deep inside the meat during the hot and fast cooking process
- This can help to prevent the brisket from drying out and result in a more juicy and flavorful final product
- It is important to be careful when injecting the brisket and not to overdo it, as too much moisture can result in a less desirable texture
- It is generally recommended to use a flavorful liquid like broth or marinade and to inject it in several places throughout the brisket to ensure even distribution
- Injecting the brisket is usually reserved for competition cooking, but can be beneficial when cooking hot and fast to help prevent moisture loss at high temperatures
Injecting the brisket with liquid can be especially beneficial when cooking hot and fast because it helps to add moisture deep inside the meat, which can be difficult to achieve through surface techniques like spritzing or mopping. This added moisture can help to keep the brisket from drying out during the cooking process and result in a more juicy and flavorful final product.
It is important to be careful when injecting the brisket, however, as overdoing it can cause the meat to become too moist and result in a less desirable texture. It is generally recommended to use a flavorful liquid like broth or marinade and to inject it in several places throughout the brisket to ensure even distribution. For more information on injecting, check out my article: Should I Inject Brisket?
Step 5: Add and Binder
A binder is something you use to help the seasoning rub stick to the meat when you’re BBQing. Without a binder, the rub might just fall off the meat or create a patchy layer of flavor. So, you slather a thin layer of binder on the meat before you add the rub. It’s kind of like glue for BBQ seasoning.
There are lots of different things you can use as a binder-olive oil, mustard, and even mayonnaise are all popular choices. Just pick something that you like the taste of (or don’t mind the taste of, since you won’t really be able to taste it in the final dish) and spread a thin layer on the meat.
Step 6: Apply a Thick Layer of Rub
A brisket rub is a mixture of spices and seasonings that is applied to the surface of a brisket before cooking. It helps to add flavor and moisture to the meat and can also create a crust or bark on the exterior of the brisket.
There are many different variations of brisket rubs, and you can use store-bought or homemade versions. Some common ingredients in brisket rubs include salt, pepper, paprika, garlic powder, onion powder, and cumin. It’s important to be careful not to over-salt the brisket, as this can make the meat too salty and unpleasant to eat.
If you are using a store-bought rub, make sure to check the label for the salt content and adjust your seasoning accordingly. Homemade rubs can be a good option because you can control the salt and other ingredients to suit your taste. For more information, check out my Brisket Rub Guide.
Step 8: Bring Your Brisket up to Room Temp
Aaron Franklin, owner of Franklin Barbecue in Austin, Texas, is a well-known expert on smoking and cooking brisket. One of his recommendations is to bring the brisket up to room temperature before cooking.
There are several reasons for this. First, if the brisket is too cold when it goes into the smoker, it will take longer to cook, which can lead to a less tender and flavorful final product. Bringing the brisket up to room temperature helps it cook more evenly and reduces the cooking time.
Second, if the brisket is too cold, it can cause the fat on the exterior of the meat to solidify. This can create a barrier that prevents the smoke and seasoning from penetrating the meat, resulting in a less flavorful final product. Bringing the brisket up to room temperature helps to melt the fat, which allows it to baste the meat and helps to create a flavorful crust or bark on the exterior of the brisket.
Finally, bringing the brisket up to room temperature helps to reduce the risk of food-borne illness. Bacteria grow more quickly at cold temperatures, so allowing the meat to sit at room temperature for a short period of time before cooking can help to reduce the risk of bacteria growing on the surface of the meat.
Step 9. Fill the Water Pan
- A water pan can add moisture to the cooking environment and help to keep the brisket moist.
- The water in the pan can also regulate the temperature of the grill or smoker, preventing it from getting too high.
- Use hot water when filling the water pan to minimize any drop in temperature.
- Monitor the water level in the pan, as it will evaporate quickly at high cooking temperatures.
- Minimize the number of times the lid of the grill or smoker is opened to maintain a steady temperature and avoid disruptions to the cooking process.
- Aim to maintain a temperature of 350°F to 375°F for optimal brisket cooking.
The purpose of the water pan is to add moisture to the cooking environment, which can help to keep the meat moist and prevent it from drying out. In the case of cooking brisket at high temperatures, the water pan can be especially useful because brisket is a tough cut of meat that can dry out if not properly cooked. The water in the pan will also help to regulate the temperature of the grill or smoker, as it absorbs some of the heat and can prevent the temperature from getting too high.
It is important to use hot water when filling the water pan, as this will help to prevent a significant drop in temperature when the pan is added to the grill. It is also important to monitor the water level in the pan, as it will evaporate quickly when cooking at high temperatures. If the water level drops too low, the pan may not be able to effectively regulate the temperature and add moisture to the cooking environment.
It is generally recommended to minimize the number of times the lid of the grill or smoker is opened while cooking. This is because opening the lid can cause fluctuations in the temperature and disrupt the cooking process. If you need to open the lid to spritz the brisket or add wood, try to do everything at once to minimize the number of times the lid is opened. Maintaining a steady temperature of 350°F to 375°F is important for cooking brisket properly.
Step 10: Set Up Your Weber Kettle
- Use either charcoal briquettes or lump charcoal for the hot-and-fast method
- Place the meat in the middle of the grill with charcoal on both sides, or place the charcoal on one side and the meat on the other
- Use a chimney starter to light the grill, and add more coals as needed
- For a 350°F cook, use 60 hot coals and a fuel supply of 100; set top vent to 1/2 open and bottom vent to 1/2-3/4 open
- For a 400°F cook, use 70 hot coals and a fuel supply of 120; set top vent to 1/2-3/4 open and bottom vent fully open
- Use a meat thermometer to ensure the food is cooked to the desired temperature
When using the hot-and-fast method to smoke a brisket, you’ll need to use either charcoal briquettes or lump charcoal (which burns hotter). To cook the brisket using indirect heat, place the meat in the middle of the grill with charcoal on both sides, or place the charcoal on one side and the meat on the other.
To light the grill, use a chimney starter to pre-light a full chimney of charcoal and place half the lit coals on each side of the unlit coals. The amount of charcoal you’ll need will depend on your desired cooking temperature-for a 350°F cook, use 60 hot coals and a fuel supply of 100 with the top vent 1/2 open and the bottom vent 1/2-3/4 open, or for a 400°F cook, use 70 hot coals and a fuel supply of 120 with the top vent 1/2-3/4 open and the bottom vent fully open.
Remember to monitor the temperature throughout the cook and add more charcoal as needed, and use a meat thermometer to ensure that your food is cooked to the desired temperature.
Step 11: Fat Side Down
When cooking brisket using the hot-and-fast method in a Weber kettle grill, it is recommended to place the brisket fat cap down. This is because the heat source in a Weber kettle grill is coming from below the meat, so the fat on the brisket will help to shield the meat from the high heat and protect the more vulnerable parts of the brisket from drying out or burning.
Placing the brisket fat cap down is especially important when cooking at high temperatures, as the fat will help to keep the meat moist and prevent it from drying out. The fat will also help to create a flavorful crust or bark on the exterior of the brisket, which can add depth and complexity to the overall flavor of the meat.
The proper brisket placement is crucial when cooking in a Weber kettle grill, especially when using the hot-and-fast method. By placing the brisket fat cap down, you can help to protect the meat from the high heat and ensure that it turns out moist and flavorful.
Step 12: Spritzing and Mopping
Mopping or spritzing a brisket is a technique in which the surface of the meat is moistened with a liquid, such as water, vinegar, or a mixture of spices and seasonings. Mopping or spritzing a brisket can help to keep the meat moist, assist in the formation of a flavorful bark or crust on the exterior of the brisket, and contribute to the development of a smoke ring.
While mopping or spritzing a brisket is a common practice when cooking at low and slow temperatures, it may not be as necessary when using the hot-and-fast method. This is because the goal of hot-and-fast cooking is to cook the brisket as quickly as possible, and mopping or spritzing the meat may actually add to the cook time. Additionally, opening and closing the lid of the grill to mop or spritz the brisket can disrupt the cooking temperature and potentially affect the final product.
Here are some spritzes that pitmasters often use for brisket:
- Water: A simple spritz of water can help to keep the surface of the meat moist and prevent it from drying out.
- Vinegar: A mixture of vinegar and water can add tanginess and depth of flavor to the brisket.
- Apple juice: A spritz of apple juice can add sweetness and a fruity flavor to the meat.
- Beer: A spritz of beer can add malty and hoppy flavors to the brisket, as well as moisture.
- Beef broth: A spritz of beef broth can add savory and meaty flavors to the brisket, as well as moisture.
- Worcestershire sauce: A mixture of Worcestershire sauce and water can add depth of flavor and a tangy kick to the brisket.
- Hot sauce: A spritz of hot sauce can add heat and a spicy flavor to the brisket.
- Barbecue sauce: A spritz of barbecue sauce can add sweetness and a tangy flavor to the brisket.
How To Spritz Brisket – The 10 Best Liquids For Smoking Meat.
Step 13: Consider a Pan for a Brisket Flat
Smoking a brisket in a pan is generally not recommended, as the pan can cause the bark or crust on the exterior of the meat to become soggy. However, there may be certain circumstances in which using a pan can be beneficial, such as when smoking a small brisket flat.
Brisket flats are the leaner part of the brisket, and they can be difficult to cook because they are prone to drying out. They are also much thinner than the point end of the brisket, which means that they are more vulnerable to drying out during the cooking process. If you are smoking a small brisket flat, you may want to consider using a pan to help keep the meat moist and prevent it from drying out.
To smoke a brisket flat in a pan, place the brisket in an aluminum pan and add a little stock or broth to the pan as well. The bottom of the flat may not have a bark or crust, but the upper side should still be able to develop one. Just be aware that the bark may not be as crispy as it would be if the brisket were smoked directly on the grill or smoker. However, using a pan can help to keep the meat moist and flavorful, which can be especially important when cooking a lean cut like a brisket flat.
Step 14: The Best Wood for Brisket
When smoking a brisket, using wood to add flavor to the meat is a common practice. Most people tend to place the wood on top of the fire, but more experienced pitmasters on the competition circuit often bury the wood amongst the coals. This technique is known as “snaking the wood” and can help to ensure that the wood smolders slowly and consistently during the cook.
To snake the wood, simply place two or three chunks of wood under the charcoal so that they are surrounded by the coals. This will allow the wood to smoke and add flavor to the brisket without burning up too quickly. If you place the wood on top of the fire, it is more likely to burn out faster and may not contribute as much flavor to the meat.
Brisket can handle a wide range of wood flavors, as long as the wood is dry and seasoned. Some popular choices for smoking brisket include hickory, pecan, oak, and other hardwoods. Experiment with different woods to find the flavors that you like best, and remember that you can always combine different woods to create a more complex and nuanced flavor profile.
| Wood Flavor | Characteristics |
|---|---|
| Maple | Sweet, subtle flavor |
| Cherry | Fruity, sweet flavor |
| Apple | Fruity, sweet flavor |
| Pecan | Nutty, mellow flavor |
| Oak | Strong, robust flavor |
| Mesquite | Strong, pungent flavor |
| Alder | Mild, delicate flavor |
| Walnut | Strong, smoky flavor |
| Peach | Fruity, sweet flavor |
Step 15: Wrapping the Brisket
When smoking a brisket using the hot-and-fast method, it is important to pay attention to the internal meat temperature and the appearance of the bark or crust on the exterior of the meat. If you are cooking a full brisket at a temperature of 350°F to 375°F in your Weber Kettle, you can expect to reach the wrapping stage in about 3 hours. If you are only smoking a brisket flat, it may take closer to 2 hours to reach the wrapping stage.
At the wrapping stage, the internal meat temperature of the brisket should be around 160°F and the brisket should have a darkish color. To check the readiness of the brisket, you can poke the meat with your finger and see if the rub sticks to the meat. If the rub comes off and sticks to your finger, it may not be ready to wrap yet.
It is important to pay attention to these factors when smoking a brisket, as they can help you to determine when the meat is ready to be wrapped and finished. By wrapping the brisket at the right time, you can help to ensure that it turns out moist, flavorful, and tender.
How to Wrap Brisket
To wrap the brisket, lay out two layers of aluminum foil or butcher paper and place the brisket on top. Pour some broth or stock onto the meat before wrapping it tightly. This will add some extra liquid to the wrapping, which will create steam and help to cook the meat faster. It will also add some extra moisture to the meat, which can be especially important when cooking at high temperatures.
When pouring in the liquid, be careful not to damage the bark or crust on the exterior of the brisket. You can pour the broth or liquid around the meat or underneath it, rather than directly on top of the bark. It is important to wrap the brisket tightly so that the steam doesn’t escape.
It is also important to keep track of the internal meat temperature during the wrapped phase of the cook. To do this, you will need to insert a thermometer probe into the brisket before putting it back into the Weber. If you don’t have a thermometer, you are essentially cooking blind, as you won’t be able to accurately monitor the progress of the meat.
Should I Wrap Brisket In Paper or Foil?
Step 16: When is the Brisket Done?
- A brisket is generally considered to be done when the internal meat temperature reaches between 190°F and 203°F.
- The exact internal temperature at which a brisket is done can vary depending on the size of the brisket, the cooking temperature, and the desired level of tenderness.
- To test the tenderness of a brisket, you can use a probe thermometer, a toothpick or fork, or the “bend test.”
- If the toothpick or fork easily slides into the meat, or if the brisket easily bends without breaking, it is likely to be tender and ready to be served.
To determine when a brisket is done, it is important to pay attention to the internal meat temperature and to perform a few tenderness tests.
According to barbecue experts and competition pitmasters, a brisket is generally considered to be done when the internal meat temperature reaches between 190°F and 203°F. At this temperature, the collagen in the meat will have broken down enough to make the brisket tender and juicy. However, it is important to note that the exact internal temperature at which a brisket is done can vary depending on a number of factors, including the size of the brisket, the cooking temperature, and the desired level of tenderness.
To perform a tenderness test, you can use a few different methods. One option is to use a probe thermometer to check the internal temperature of the brisket. Another option is to use a toothpick or a fork to test the tenderness of the meat. If the toothpick or fork easily slides into the meat, then it is likely to be tender. Another option is to use the “bend test,” in which you gently press down on the brisket and see how easily it gives. If the brisket is tender, it should easily bend without breaking.
Step 17: Resting the Brisket
- The resting and holding phase allows the brisket to cool down and the juices inside the meat to be redistributed, which can improve the overall tenderness and flavor of the brisket.
- Experts recommend allowing the brisket to rest and hold for at least 30 minutes, but some pitmasters prefer to hold the meat for up to 2 hours.
- To hold the brisket, you can wrap it in foil or butcher paper and place it in a cooler or an oven set to a low temperature. Alternatively, you can place the brisket in a foil pan and cover it with foil or a lid.
- The resting and holding phase is not the same as the wrapping phase, which occurs earlier in the cooking process. During the wrapping phase, the brisket is wrapped in foil or butcher paper and cooked until it reaches the desired internal temperature. The resting and holding phase occurs after the brisket is done cooking and is meant to allow the meat to rest and hold before it is sliced and served.
Once the brisket is done, it is important to allow it to rest and hold for a period of time before slicing and serving it.
During the resting and holding phase, the brisket is allowed to cool down and the juices inside the meat are redistributed. This can help to improve the overall tenderness and flavor of the brisket. Experts recommend allowing the brisket to rest and hold for at least 30 minutes, but some pitmasters prefer to hold the meat for up to 2 hours.
To hold the brisket, you can wrap it in foil or butcher paper and place it in a cooler or an oven set to a low temperature. Alternatively, you can place the brisket in a foil pan and cover it with foil or a lid. This will help to keep the meat warm and moist while it rests and holds.
It is important to note that the resting and holding phase is not the same as the wrapping phase, which occurs earlier in the cooking process. During the wrapping phase, the brisket is wrapped in foil or butcher paper and cooked until it reaches the desired internal temperature. The resting and holding phase occurs after the brisket is done cooking and is meant to allow the meat to rest and hold before it is sliced and served.
Step 18: Slicing Brisket
- Use a sharp knife with a long, thin blade to slice the brisket.
- Trim off any excess fat from the surface of the brisket before slicing.
- Slice the brisket against the grain, cutting across the lines of muscle fibers rather than with them. This can help to make the brisket more tender and easier to chew.
- The thickness of the slices can be adjusted to your personal preference and the size of the brisket.
- You can slice the brisket into smaller portions or leave it whole and slice as needed when serving.
- Use a carving fork or other utensil to help hold the meat steady while slicing, if needed.
To slice a brisket, it is best to use a sharp knife with a long, thin blade. Start by trimming off any excess fat from the surface of the brisket. Then, slice the meat against the grain, which means cutting across the lines of muscle fibers rather than with them. This can help to make the brisket more tender and easier to chew.
Some pitmasters prefer to slice the brisket into thin slices, while others prefer thicker slices. The thickness of the slices will depend on your personal preference and the size of the brisket. You can also choose to slice the brisket into smaller portions or to leave it whole and slice it as needed when serving.
It is important to note that the slicing process can be challenging, as the brisket may be difficult to hold steady while slicing. You may need to use a carving fork or other utensil to help hold the meat in place while slicing. Alternatively, you can ask someone to help hold the meat steady while you slice it.
By using a sharp knife and slicing the brisket against the grain, you can achieve perfectly sliced brisket that is tender and flavorful.
My Favorite Brisket Tools
Thanks for checking out this article. I hope you learned a few things. Here are some of my favorite tools I use when smoking brisket that may be useful to you. These are affiliate links, so if you decide to purchase any of these products, I’ll earn a commission. But in all honesty, these are the tools I recommend to my family and friends who are just starting out.
Meat Injector: Injecting meat is a great way to take your barbecue to the next level and help you make competition-style brisket. An injector is the only way you will be able to get flavor and moisture into the middle of the meat. The Beast Injector is a stainless steel injector that is sturdy and affordable. Check the latest price on Amazon here.
Brisket Marinade: The best injection solution on the market is the Butcher BBQ Brisket Injection. This marinade is used in competitions and is made by World Barbecue Champion pitmaster, Dave Bouska. You can find the marinade on Amazon here.
Butcher Paper: Wrapping brisket in butcher paper has become a huge trend in barbeque thanks to Aaron Franklin. Wrapping your brisket in paper will give you a nice brisket bark. However, you can’t just use any old paper, it has to be unwaxed, food grade paper. You can find it on Amazon here.
Brisket Rub: These days I make my own rub when possible, but I always have a few pre-made rubs for when I’m running low. Barbecue guru Malcom Reed produces Killer Hogs, one of the best brisket rubs I’ve found over the years. Another great rub is Slap Yo Daddy, made by brisket master and multiple World Barbecue Champion, Harry Soo.
Meat Thermometer: There are dozens of fancy thermometers on the market, but I still use my trusty TP20. For around $50, I have a high-quality meat thermometer with two probes, and can track the temperature of my smoker with one probe, and my meat with the other probe. The ThermoPro TP20 is an Amazon Best Seller because it’s the easiest thermometer to operate, is durable, highly accurate, and comes with pre-programmed meat settings.
Instant Read Thermometer: Arguably, the second most important tool you need is a fast and accurate instant-read thermometer. These tools play an important role in the latter stages of the cook when the meat needs regular checking in multiple areas. I use the ThermoPro TP19 because it can do everything a ThermaPen can do, but for a fraction of the cost. You can check out the TP19 on Amazon here.
Advanced Thermometer and Automatic Temperature Controller: Once you’re ready to take things seriously, the FireBoard 2 Drive is a six-channel Bluetooth/Wi-Fi thermometer that can monitor up to 6 pieces of meat, control and graph your cook sessions on your smartphone, and attaches to an an automatic blower that will convert your charcoal smoker to a set-and-forget. This is one of the most advanced meat thermometers on the market. You can check it out on the FireBoard website here.