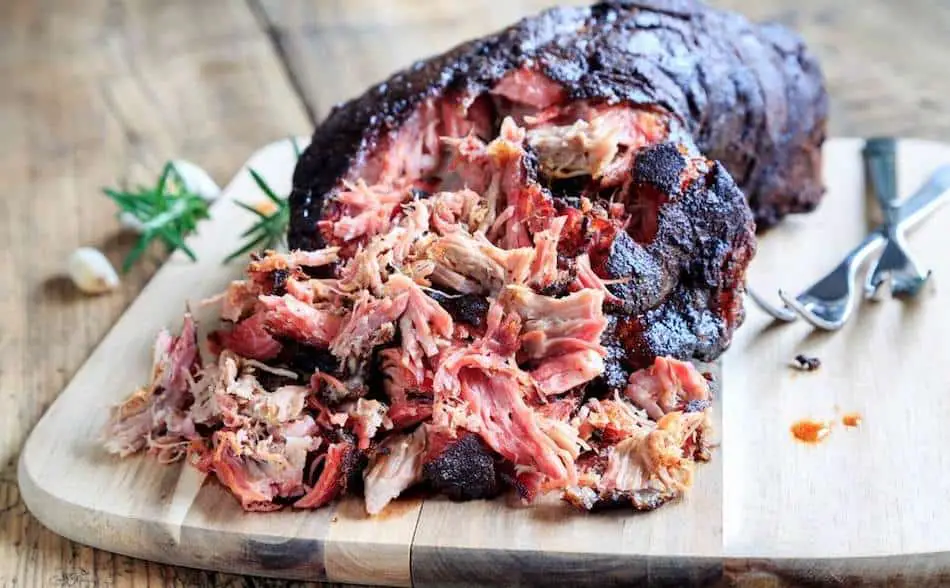
Delicious and flavorful pulled pork is one of the best dishes to cook on your smoker if you want to impress your friends and family. To help you perfect your pulled pork, we’ve gathered some expert tips and guidelines to follow. So fire up your smoker and get ready to cook up a batch of mouthwatering pulled pork!
To smoke the pork, use a low and slow method, keeping the temperature of the smoker between 225°F and 250°F. As the internal meat temperature approaches 160°F, wrap the pork butt in foil to help it continue cooking to an internal temperature of 200°F. Once the pork is done cooking, allow it to rest for about an hour before shredding it and serving. With these simple guidelines, you can enjoy perfectly smoked pulled pork every time.
| Step | Description |
|---|---|
| 1 | Trim any large chunks of fat off the pork. |
| 2 | Combine the rub if making homemade recipe. For a Texan rub, combine a 50/50 mix of cafe-grind black pepper and kosher salt. If you want some color, add a small amount of paprika. For some savory tones, add some granulated onion and garlic powder. |
| 3 | Put the rub in a shaker. |
| 4 | Using olive oil, apply a binder to the meat so the rub sticks. Apply a generous amount of the rub so it’s completely covered. |
| 5 | Set the temperature of your smoker to between 225°F and 275°F. |
| 6 | Throw on some smoking wood. Hickory blends well with pork. If you want a softer smoke, use apple or cherry. |
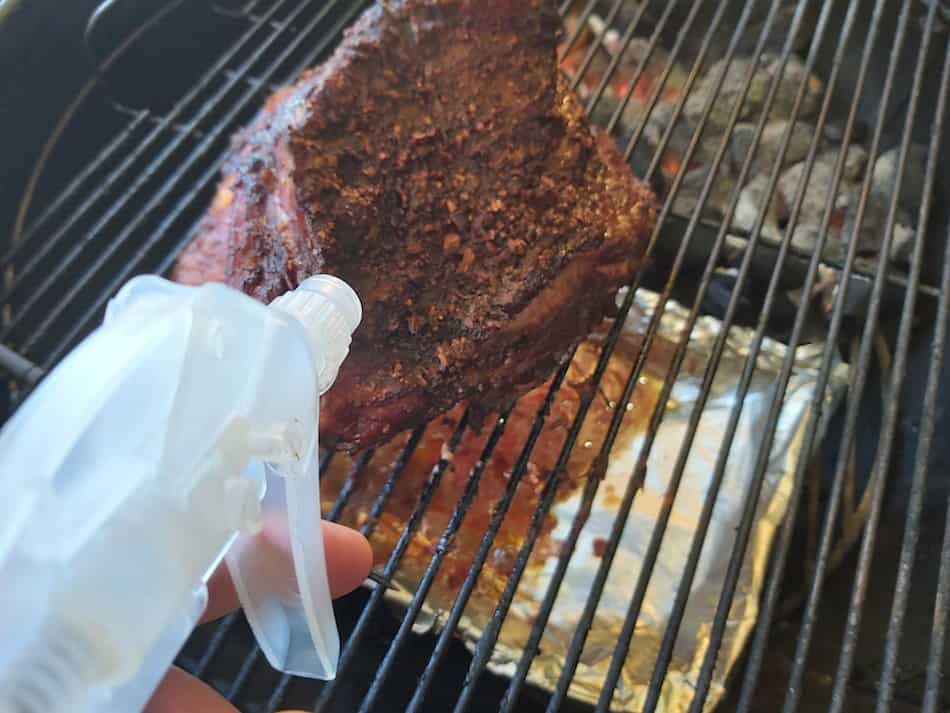
| 7 | Leave the pork in the smoker for 5 hours, spritzing every few hours with apple cider vinegar. |
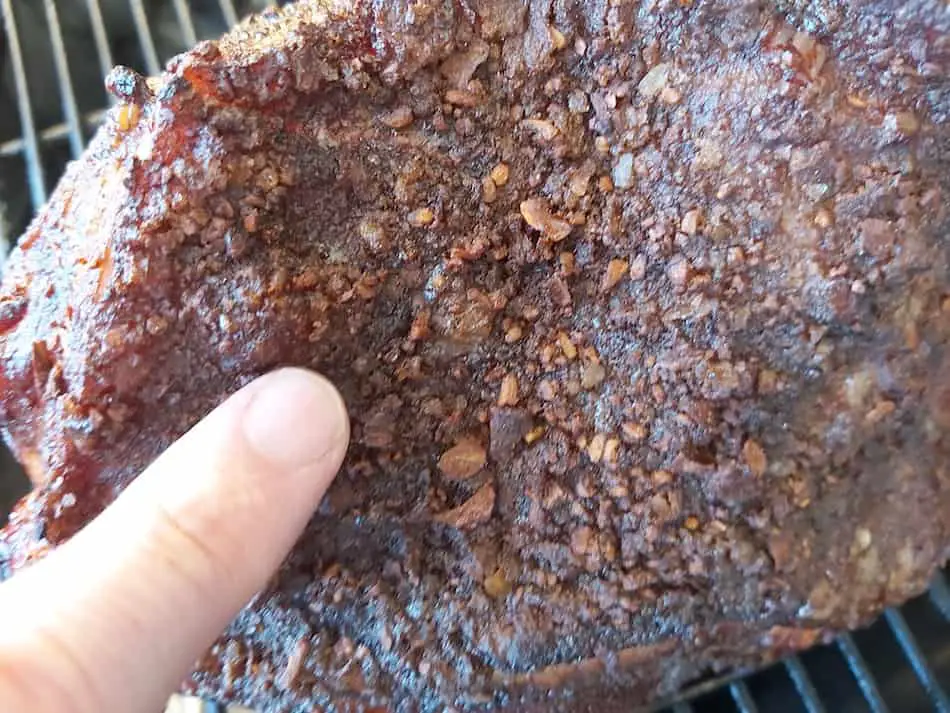
| 8 | Assess the bark. Once the bark has cracked, it’s time to wrap. |
| 9 | Wrap the pork in two layers of thick aluminum foil. |
| 10 | Before you close the foil, spritz with apple cider vinegar. |
| 11 | Place back into the smoker at 275°F for another 3 hours. |
| 12 | At about the 8-hour mark, check the pork. It should be close to done. |
| 13 | Perform a tenderness test. If you can pull the bone out of the pork, that’s a sign the meat is tender and ready to be shredded. |
| 14 | Rest the pork for 30 to 45 minutes to allow the meat to reabsorb the juices. |
| 15 | Shred the meat for pulled pork. |
How Long Will It Take To Cook?
The total cook time will depend on the size of the pork, the cooking temperature, the humidity, and the level of doneness. In general, it should take about 7 to 9 hours for a standard-sized pork shoulder.
Here are the key points to remember when cooking pork shoulder for pulled pork:
- Cooking time is roughly 1 hour per pound or 1.5 hours per pound, depending on the temperature of your smoker
- The total cook time is determined by the weight of the pork shoulder and the cooking temperature, so it’s difficult to predict exactly how long it will take
- On average, it takes around 8 hours to cook a pork shoulder for pulled pork
- Pork shoulders are usually 6 to 10 lbs and it’s best to use one with a bone for added moisture and as a tenderness test
- If you want fully off-the-bone tender pork, twist the bone at the end of the cook to check for doneness
Choosing The Right Pork
Pork shoulder, also known as pork butt or Boston butt, is the perfect cut of meat for making delicious pulled pork. This cut comes from the upper part of the pork shoulder, and is known for its high fat content and rich flavor. When cooked low and slow, the fat and gristle in pork butt melt away, leaving behind tender, succulent meat that can easily be pulled apart.
It’s important to note that despite its name, pork butt is not actually from the rump of the pig. The term “butt” dates back to the days when cheap cuts of meat, like pork shoulders, were stored in barrels called “butts”. In Boston, pork shoulder became a specialty, leading to the name “Boston butt”. Pork butt can range in size from 4 to 9 pounds. For a 5 pound pork butt, you should expect to cook it for about 6 hours at a temperature of 225°F, using a low and slow method.
Pork shoulders have many names depending on where you live. Make sure you know what it looks like and speak to your butcher. Here are some names for pork butt.
- Pork Butt
- Boston Butt
- Shoulder Butt
- Shoulder Roast
- Country Roast
- Shoulder Blade Roast
- Boston roast
- Shoulder Blade
- Four-quarter Roast
- Pork Shoulder Roast
- Pork Shoulder on the bone
- Pork Hand
What To Look For When Buying Pork Shoulder
According to these experts, there are several key factors to consider when choosing a pork butt for smoking:
- Look for marbling: Marbled pork butt tends to be more flavorful and tender when cooked.
- Choose the right size: A larger pork butt may take longer to cook, but it will also provide more servings. Consider the size of your smoker and the number of people you are serving when choosing a pork butt.
- Buy a pork butt with the bone-in. This will help keep the pork moist.
- Buy a pork butt with a large money muscle. This is the best part of the butt.
- Check for freshness: Fresh pork butt should have a pink color and a mild smell. Avoid pork that is gray or has a strong, off smell.
- Consider the breed: Different breeds of pigs will produce pork with different flavors and textures. If you want to try a specific breed, look for labels or ask your local butcher.
- Look for a well-shaped pork butt: A pork butt that is well-shaped and has a good balance of fat and muscle will likely be more tender and flavorful when cooked.
Watch this quick video on how to select the best pork butt from a competition smoker. Talk to your local butcher and select a butt with a big money muscle on the front side of the shoulder. This is the most tender muscle of the pork shoulder. Another thing to look out for is a large muscle under the Y bone. The meat around the Y bone is very tender and has great flavor.
Preparing The Pork For Smoking
One important aspect to consider when preparing pork butt for smoking is the fat content. The fat is usually concentrated on one side of the meat, and it can help add flavor and moisture to the final dish. However, it’s important to remove any glands or blood clots from the underside of the pork, as they will not render properly and can affect the overall flavor.
Some pitmasters choose to leave a lot of the fat on the pork butt when smoking it, as they believe it can add flavor and moisture to the otherwise somewhat bland meat. If the pork butt you are using comes with the rind attached, make sure to remove it before smoking. The rind can prevent smoke from penetrating the meat, and it can also be cooked separately as a side dish, such as pork crackling.
- Remove the skin: The skin on a pork butt can be tough and may not render properly when cooked. It’s best to remove it before smoking.
- Trim excess fat: While some fat is necessary to keep the pork moist and flavorful, excessive fat may not render properly and can lead to a greasy final product. Trim away any large chunks of fat that are not necessary.
- Remove the bone: Some pork butts may come with a bone, which can be removed before smoking. Removing the bone can make the pork easier to pull and can also help it cook more evenly. However, some pitmasters leave the bone-in because they believe it helps keep the pork butt moist.
“Slather” So The Rub Sticks
To ensure that your rub sticks to the pork butt and helps form a flavorful bark, it can be helpful to use a binder. One option is to use olive oil, which can help the rub adhere to the meat and can also contribute to the overall color of the final dish. Some people also use yellow mustard as a binder, which can help the rub stick and form a strong, even bark. Keep in mind that the binder you choose will not affect the flavor of the final dish, so you can use whichever option you prefer.
The bark, or the flavorful crust that forms on the outside of the pork butt, is one of the standout features of pulled pork. The rub you use plays an important role in the formation of the bark, so it’s important to make sure that it sticks well to the meat. By using a binder like olive oil or mustard, you can ensure that the rub adheres evenly to the pork and helps create a flavorful and appetizing bark.
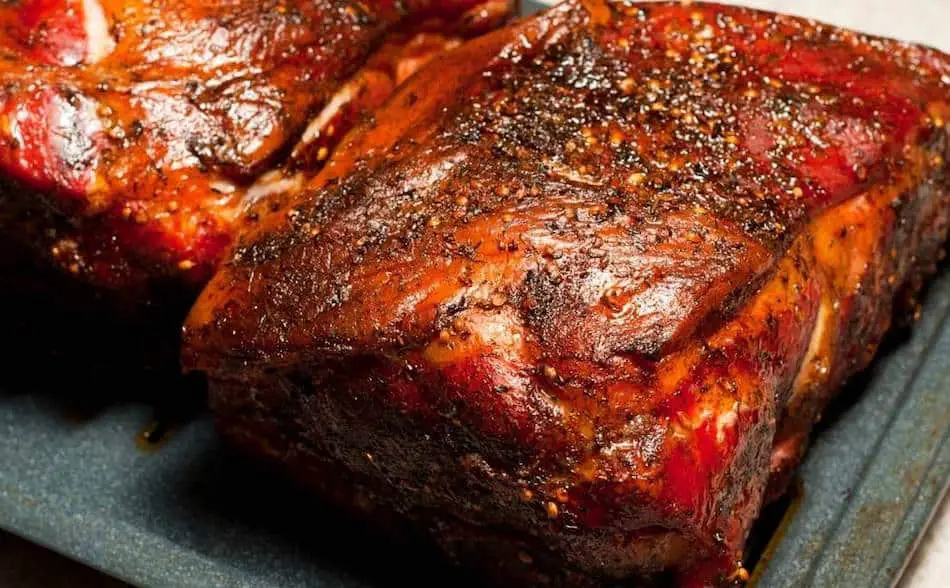
Make The Bark Crispy
The bark, or the outer crust of the meat, is an important and highly sought-after component of pulled pork. It provides a delicious crunch and adds layers of flavor to the dish. The bark is created through a combination of smoke, seasoning (the rub), and the natural dehydration of the meat as it cooks.
When smoking meat low and slow, it’s all about developing layers of flavor. Most of these flavors are built on the outer layers of the meat, which is why pitmasters like Aaron Franklin spend so much time and effort nurturing and developing the bark. For Franklin, the process of creating the perfect bark is like art, requiring careful attention and a skilled touch. Whether you’re a seasoned pitmaster or a beginner, focusing on the bark can help you create a pulled pork dish that is full of flavor and texture.
6 Ways To A Crispy Bark
If you love a hard, crusty bark on your pulled pork, then here are some tips on how to get it.
- Don’t wrap the pork butt in foil. Wrapping in foil helps the pork to cook after and make it moist and tender, but if you want bark, loose the foil.
- Make sure you use plenty of rub. After a few hours of cooking, the rub dries and helps form a layer crust.
- If you cut the pork shoulder in half, the pork will naturally have more crust because you are increasing the outer layer and forming more crust.
- Trim the fat on the top side of the pork butt. You will not get much of a crust if there is a thick fat cap.
- Leave the pork on the grill rather than placing in an aluminium pan. If the meat is sitting in a pan, the bottom of the roast will remain moist and won’t dry out.
- Score the meat with diamond-shaped incisions all across the roast. This will enable the rub to penetrate deeper and work its magic. You will also get a better crust with this method.
The Best Rub Recipe For Pulled Pork
Standard Barbecue Rub

I found this great rub recipe through How To BBQ Right. I use this recipe and alter it slightly depending on what I'm cooking. Made by the guys at Townsend Spice & Supply: https://townsendspice.com/
Ingredients
- - ½ Cup Paprika
- - ½ Cup Salt
- - ½ Cup Sugar
- - ½ Cup Granulated Garlic
- - ¼ Cup Granulated Onion
- - ¼ Cup Chili
- - ¼ Cup Cumin
- - 2 Tablespoons Black Pepper
- - 2 Tablespoons Dry Mustard
- - 1 Tablespoon Cayenne Pepper
Instructions
- Combine all the spices together in a large mixing bowl
- Store rub in rub shakers
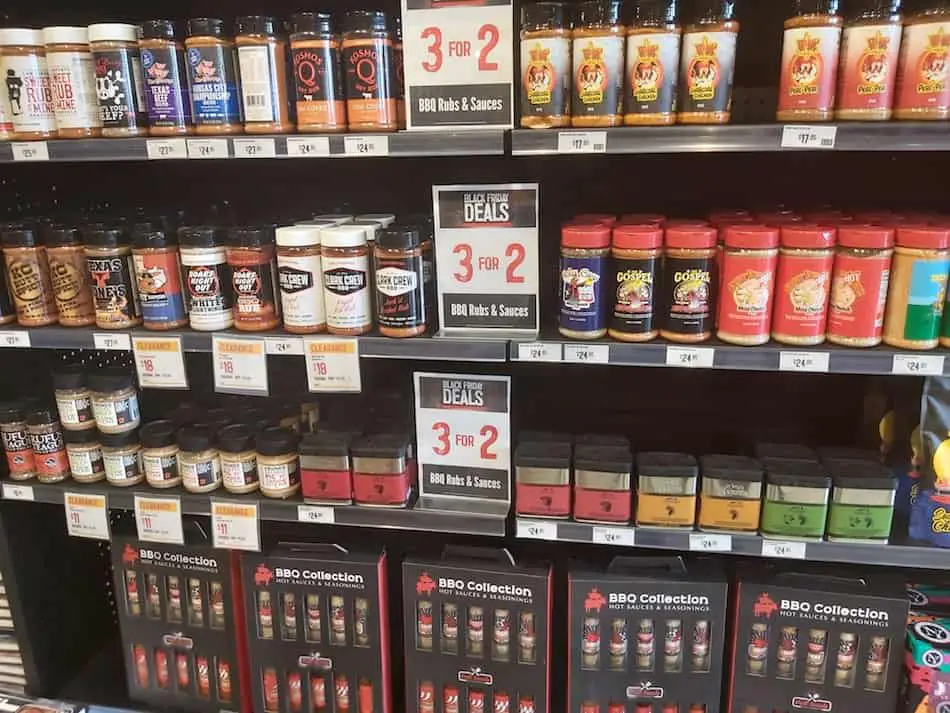
Sprinkle Pro Rubs
If you want a Texas-style rub on your pork butt, like Aaron Franklin does, use a generous amount of black pepper. If you prefer a different type of rub, consider using a standard barbecue rub or a commercial product like Killer Hogs or Slap Yo Daddy. Keep in mind that the resulting pork butt will likely have a darker appearance due to the heavy use of black pepper, which is common in Texas-style rubs. If you would like to learn more about other types of rubs, you can refer to this article for more information.
Cooking Temperature: Keep Low-and-Slow
I’ve absorbed information from several well-known barbecue experts who have shared their techniques and recipes for smoking pork butt. While each of these experts may have their own specific preferences, in general, it is common to smoke pork butt at a low temperature of around 225°F to 250°F. This temperature range allows the pork to cook slowly and evenly, resulting in a tender, juicy pulled pork. Aaron Franklin is known for smoking pork butt at a temperature of 275°F in an offset smoker. This temperature is maintained throughout the cooking process.
So in general, you can smoke pork butt at any temperature between 225°F and 275°F, but the cook time will vary. Franklin prefers a higher temperature of 275°F, which is higher than the typical low-and-slow range of 225°F. It is important to be cautious when cooking at higher temperatures, as the meat can become dry if it is cooked above 275°F. Cooking at 275°F will result in a faster cook time, but it is important to keep an eye on the temperature to ensure the pork does not dry out.
Use These Wood Flavors
According to pitmasters, some of the best woods for smoking pork butt are oak, hickory, pecan, and cherry. Oak is a classic choice for smoking pork butt because it has a strong, smoky flavor that pairs well with the rich flavor of pork. Hickory is another popular option because it imparts a strong, smoky flavor and is often used in combination with oak. Pecan is a milder wood that adds a sweet, nutty flavor to the pork, and cherry is known for its fruity, sweet flavor that pairs well with pork.
Here is a table of woods commonly used for smoking pork butt, along with descriptions of their flavors:
| Wood | Flavor |
|---|---|
| Oak | Strong, smoky flavor |
| Hickory | Strong, smoky flavor |
| Pecan | Mild, nutty flavor |
| Cherry | Fruity, sweet flavor |
Fat-Side-Up or Fat-Side-Down?
When smoking pork butt, it is generally recommended to cook the fat-side-down if the heat source is coming from below, as the fat will help insulate the meat and prevent it from drying out. However, if you are using an offset smoker, like Aaron Franklin does, the heat is coming from the side, so cooking fat-side-up is generally recommended. It’s also a good idea t flip the meat at some point during the cooking process can help ensure an even cook. If you notice that one side is not getting enough color, consider flipping the meat a few hours into the cook.
Water Pans? Do You Need Them?
Using a water pan when smoking pulled pork can be beneficial for several reasons. First, the water pan helps to regulate the temperature inside the smoker by providing a surface for the heat to pass through. This can help prevent the temperature from fluctuating too much, which can lead to an uneven cook. Also, the water pan can help to add moisture to the cooking environment, which can help to keep the meat from drying out. This is especially important for long cooks, like when smoking pulled pork, as the meat will be exposed to heat for an extended period of time.
Aaron Franklin believes the water pan can help to create a better bark on the meat. The bark is the crispy, flavorful outer layer that forms on the surface of the meat during the cooking process. The water pan can help to create a more consistent bark by providing a more stable cooking environment.
Leave It Alone For 5 Hours
During the first 4-5 hours of the cook, it is important to resist the temptation to open the lid of the smoker. This is because opening the lid will cause the temperature inside the smoker to fluctuate, which can lead to an uneven cook. It will also cause the smoker to lose heat, which will extend the total cook time.
Instead, during the first 5 hours of the cook, let the meat absorb smoke and develop its bark. By not opening the lid and disrupting the cooking process, you will allow the meat to develop a nice, crunchy bark, similar to a brisket. After about 5 hours, the bark should be well-developed and ready to be checked on.
Adding Extra Moisture By Spritzing
Spritzing pork butt involves spraying the meat with a liquid while it is cooking. This can help to add moisture and flavor to the meat, and can also help to create a more tender final product.
There is some debate among pitmasters about the best time to spritz pork butt. Some experts, like Aaron Franklin, recommend only spritzing just before wrapping the meat. This is because spritzing too early in the cooking process can lead to a patchy bark, as the liquid can cause the rub to wash off the meat and leave gaps in the bark.
Others believe that spritzing the meat periodically throughout the cook can be beneficial, as it can help to keep the meat from drying out. However, it is important to be careful not to spritz too frequently, as this can also lead to a patchy bark.
As for what to use when spritzing pork butt, many pitmasters recommend using a combination of water, apple cider vinegar, and other flavorful ingredients like hot sauce or Worcestershire sauce. This can help to add moisture and flavor to the meat, while also helping to create a more tender final product. Ultimately, the decision of when and how to spritz pork butt will depend on your personal preference and the specific characteristics of your smoker.
Wrapping Techniques For Tender, Juicy Pulled Pork
- Begin checking the pork butt for signs that it is ready to be wrapped after about 4 hours of cooking.
- Look for cracks forming on the bark and check the meat for juice flow when squeezed. These are both signs that the pork is ready to be wrapped.
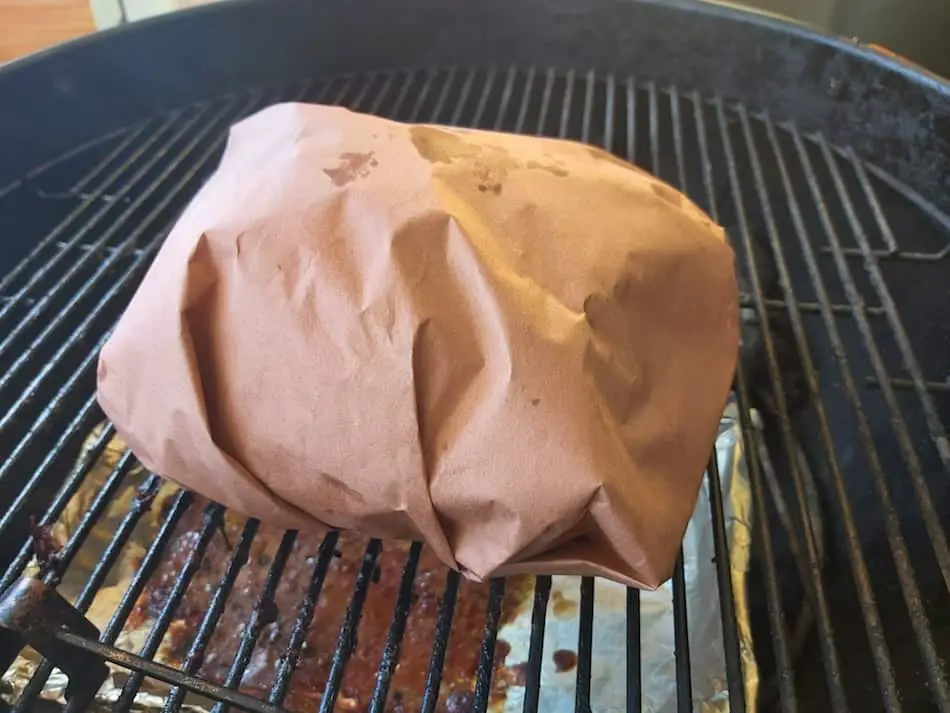
- Lay out two layers of heavy duty aluminum foil or butcher paper.
- Saturate the pork with a spritz of apple cider vinegar to add moisture and flavor.
- Place the pork on top of the foil or butcher paper.
- Wrap the pork tightly, making sure to seal all edges and prevent any liquid from escaping.
- Return the wrapped pork to the smoker and continue cooking until the desired level of tenderness is reached.
Most pitmasters typically begin checking the pork butt for signs that it is ready to be wrapped after about 4 hours of cooking. Aaron Franklin looks for cracks forming on the bark and checks the meat for juice flow when squeezed, as these are both signs that the pork is ready to be wrapped. Franklin then wraps the pork butt in heavy duty aluminum foil or butcher paper, using two layers of foil to prevent any liquid from escaping.
Pork butt is typically wrapped during the smoking process to help keep the meat moist and tender. The timing of when to wrap the meat will depend on the specific characteristics of your smoker and the desired final result.
Before wrapping the pork, most experts like to saturate the meat with a spritz of apple cider vinegar to add moisture and flavor. This helps to ensure that the pork remains moist and flavorful during the remainder of the cooking process.
In general, the decision of when to wrap pork butt will depend on your personal preferences and the specific characteristics of your smoker. By paying attention to the bark and juice flow, you can determine when the pork is ready to be wrapped and ensure that it turns out tender and flavorful.
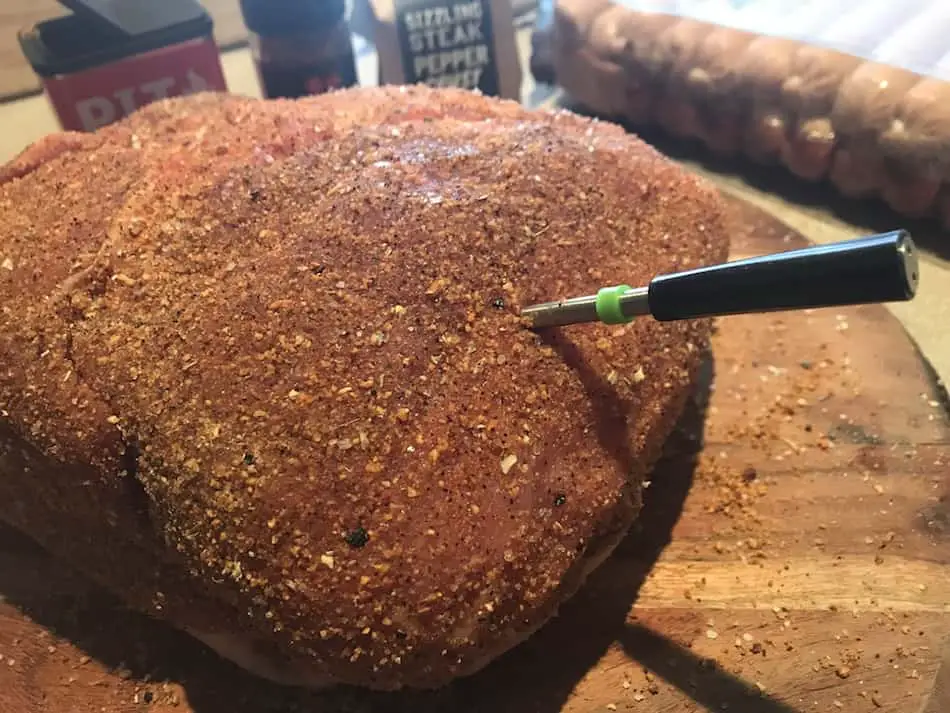
When Is It Done?
One way that experts determine when pork butt is done is by using their senses to assess the look and feel of the meat. Most pitmasters won’t rely on exact cook times or follow strict recipes, and some rarely use thermometers to cook to specific internal meat temperatures. Instead, many gurus go by their instincts and experience to determine when the pork is ready.
However, until you know what to look for, I would continue using thermometers to make the final call. While cooking to exact internal temperatures and following set spritzing regimes can be helpful for those who are learning how to smoke meat, it is important to eventually learn to rely on your senses and develop your own instincts. This can take time and practice, but it can help you to become a more confident and skilled pitmaster.
One temperature that is often used as a guide in the barbecue community is 203°F for brisket and pork butt. This temperature is generally considered to be a good indicator that the meat is fully cooked and ready to be served. However, it is important to keep in mind that every smoker is different and that the exact internal temperature of the meat may vary depending on the specific characteristics of your smoker and the desired final result.
Resting Times
Resting pulled pork after it has been smoked is an important step that allows the meat to relax and reabsorb moisture, resulting in a juicier and more tender final product. When smoking pulled pork, it is generally recommended to allow the meat to rest for at least 30 to 45 minutes before serving. This will give the muscles time to relax and allow the meat to reabsorb some of the moisture that it has lost during the cooking process.
If you are not ready to serve the pulled pork immediately after it has finished cooking, you can also hold it in a dry cooler for 4 to 5 hours. To do this, simply wrap the meat in foil and then wrap it again in a dishcloth before placing it in the cooler. This will help to keep the meat at a safe temperature until it is ready to be served.
How to Shred Pulled Pork
The best advise is to only shred what you need. The moment you pull the pork, the meat will dry out. Once the pork has rested, shred the meat in an aluminium pan. Keep all the meat juices and mix them into the shredded meat.
There are several methods that experts use to shred or pull pork, depending on the desired final result and the specific characteristics of the meat. Here are a few common techniques:
- Using meat claws or shredders: As mentioned previously, meat claws are a popular and effective tool for shredding pulled pork. They are shaped like bear claws and can be used to easily shred the meat into small pieces, especially while it is still hot.
- Using a fork: Another common method for shredding pulled pork is to use a fork to pull the meat apart into small pieces. This can be done by inserting the tines of the fork into the meat and using a twisting motion to pull it apart.
- Using your hands: Some experts prefer to use their hands to shred or pull pork, as it allows them to feel the texture of the meat and get a sense of when it is ready to be shredded. To do this, simply use your fingers to pull the meat apart into small pieces.
How To Avoid Dry Pulled Pork
Here are the key points to remember to prevent dry pork:
- Cook pork slowly at a low temperature to retain moisture
- Baste pork with a liquid every hour during cooking
- Wrap pork in foil for the second half of the cook to create steam and add moisture
- Dry brine pork with salt before cooking to retain moisture
- Properly rest pork after cooking to allow juices to redistribute
- Avoid slicing pork too soon after removing it from the heat to prevent loss of juices
How To Smoke Pulled Pork on a Kettle Grill
| Temperature | Method | Coal | Fuel Supply | Time to Stabilize | Cook Time | Top Vent | Bottom Vent |
|---|---|---|---|---|---|---|---|
| 225-250°F | Low & Slow | Charcoal | Quality Hardwood Briquettes | 5-6 hours | 10-12 hours | 1/8-1/4 open | 1/8-1/4 open |
Kettle grills are one of the best ways to smoke a pork butt low-and-slow. For the smoking process, you will want to maintain a temperature of 225-250°F. To do this, you can use the top and bottom vents to adjust the airflow and regulate the temperature. The top vent should be kept 1/8-1/4 open, while the bottom vent should also be kept 1/8-1/4 open.
It’s important to give the grill time to stabilize before you begin cooking. This can take anywhere from 5-6 hours, depending on the size of the pork butt and the temperature you are trying to maintain. Once the grill is stable, you can expect the cook time to be around 10-12 hours for a pork butt.
Keep an eye on the temperature and make adjustments to the vents as needed to maintain a consistent temperature throughout the cooking process. Use a good quality meat thermometer to check the internal temperature of the pork butt to ensure it is cooked to the proper temperature (around 190-200°F).
Remember to keep the grill covered as much as possible to retain heat and moisture, and consider using a drip pan to catch any excess fat. Use a good quality wood such as hickory or oak for the best flavor, and be sure to add wood chips or chunks to the coals every hour or so to keep the smoke going.
The Snake Method For Smoking Pulled Pork
Another popular way to slow cook pulled pork is by using the snake method.
- To use the snake method for smoking on a Weber Kettle grill, you will need to arrange your charcoal in a spiral pattern that resembles a snake wrapped around the outer layer of the grill.
- The snake should be at least two briquettes wide, with one layer of briquettes on top.
- To ensure a consistent flow of smoke, you can scatter wood chips or chunks on top of the snake.
- Light six or seven charcoal briquettes in a charcoal chimney and allow them to become hot.
- Place the hot coals at the head of the coal snake. As the hot coals ignite the briquettes in the snake, the fire will slowly spread, lighting one briquette at a time.
- If the temperature is not hot enough, you can try building a thicker or longer snake to increase the amount of heat.
- You can also adjust the top and bottom vents on the grill to regulate the airflow and temperature.
- By following the snake method and using quality hardwood briquettes or lump charcoal, you can achieve delicious smoked meats on your Weber Kettle grill.
The Minion Method
The Minion Method is another popular way to lay out charcoal for long cooks like pork shoulder. This method allows for a consistent and controlled cooking temperature over a longer period of time, as the fire slowly spreads through the unlit charcoal. The wood chunks also add flavor to the food being grilled.
The Minion method for grilling involves the following steps:
- Pile charcoal into a Weber Kettle grill, leaving a gap in the middle (a “crater”)
- Use a charcoal chimney to light about 20 briquettes
- Pour the hot, lit briquettes into the middle of the crater in the Weber Kettle
- Place wood chunks underneath the unlit charcoal, which will slowly catch and smolder during the cooking process
- The lit coals in the middle will slowly ignite the unlit coals, providing a consistent temperature for several hours
Pulled Pork Sliders
Pulled pork sliders are a delicious and easy way to serve pulled pork, and there are many different ways to build them. Sliders are small sandwiches, typically made with mini hamburger buns and a variety of fillings. The term “sliders” is often used to describe mini hamburgers, but sliders can be made with any type of filling, including pulled pork. Sliders are popular at parties and events because they are easy to eat and can be customized to suit a variety of tastes. For more information, check out “Pulled Pork Sliders”
How To Make Sliders: Step-by-Step
| Ingredients | Instructions |
|---|---|
| 1 Pack of Hawaiian rolls or small slider buns | Take your slider buns, and cut them in half separating the tops and the bottom’s keeping the buns connected. |
| 1 pork butt (Boston butt/pork shoulder) | Place the burger bottoms in a pan or a baking dish. |
| Cheese slices | Put a layer of pulled pork on the of the burger bottoms. |
| Sliced onions | Put a layer of caramelized onion on top of the pork. |
| Cover the burger bottoms with Swiss cheese or cheddar cheese. | |
| Apply barbecue sauce on top of the cheese and spread it with a basting brush. | |
| Place the tops of the burgers on the sliders | |
| Based the tops of the buns with melted butter and sprinkle with sesame seeds. | |
| Place the sliders into the oven for 5 minutes until the cheese melts. | |
| Remove and cut the buns, separating all the sliders. |
The Best Pulled Pork Shredders
| Meat Claws | Price | Features |
| Bear Paws | $13 -15 (check latest) | 475°F heat resistant, BPA-free nylon material, dishwasher safe, 100% USA made, 6 colors, 12 x 6 x 1 inches, 4.4 ounces. |
| Cave Tools | $18 -$20 (check latest) | Amazon Choice, extra knuckle space, stainless steel material, made in China. |
| KAMaster Pork Puller Drill Attachment | $30 Check latest. | Attaches to your power drill, 13” long stainless steel rod. Amazon Choice. |
| OXO Good Grips Shredding Claws | $17 ( check latest ) | Long handled claws. Nylon material. 4 x 2 x 9 inches, 9.6 ounces. |
My Favorite Meat Smoking Tools
Thanks for checking out this article. I hope you learned a few things. Here are some of my favorite tools I use when smoking brisket that may be useful to you. These are affiliate links, so if you decide to purchase any of these products, I’ll earn a commission. But in all honesty, these are the tools I recommend to my family and friends who are just starting out.
Meat Thermometer: There are dozens of fancy thermometers on the market, but I still use my trusty TP20. For around $50, I have a high-quality meat thermometer with two probes, and can track the temperature of my smoker with one probe, and my meat with the other probe. The ThermoPro TP20 is an Amazon Best Seller because it’s the easiest thermometer to operate, is durable, highly accurate, and comes with pre-programmed meat settings.
Instant Read Thermometer: Arguably, the second most important tool you need is a fast and accurate instant-read thermometer. These tools play an important role in the latter stages of the cook when the meat needs regular checking in multiple areas. I use the ThermoPro TP19 because it can do everything a ThermaPen can do, but for a fraction of the cost. You can check out the TP19 on Amazon here.
Wireless Thermometer: The latest thermometers on the market have no wires and can be controlled by wi-fi via your phone. Airprobe 3 is the best of this technology.
Butcher Paper: Wrapping brisket in butcher paper has become a huge trend in barbeque thanks to Aaron Franklin. Wrapping your brisket in paper will give you a nice brisket bark. However, you can’t just use any old paper, it has to be unwaxed, food grade paper. You can find it on Amazon here.
Advanced Thermometer and Automatic Temperature Controller: Once you’re ready to take things seriously, the FireBoard 2 Drive is a six-channel Bluetooth/Wi-Fi thermometer that can monitor up to 6 pieces of meat, control and graph your cook sessions on your smartphone, and attaches to an an automatic blower that will convert your charcoal smoker to a set-and-forget. This is one of the most advanced meat thermometers on the market. You can check it out on the FireBoard website here.