The art of smoking ribs is a true labor of love, and there’s nothing quite as satisfying as presenting a platter of tender, smoky ribs to your family and friends. While pellet grills have made the process much easier, there are still so many techniques to be mastered. I did some research on the seven types of pork ribs and developed a comprehensive guide, breaking down the rib smoking process into simple steps for use on any pellet grill.
It takes about 5 to 6 hours to smoke pork ribs on a pellet grill using the 3-2-1 method. Apply a generous layer of rub and seasoning to the ribs. Set the temperature of your pellet grill to 250°F and use a wood that blends well with pork such as apple, cherry or hickory. Smoke the ribs for 3 hours uncovered, spritzing every hour. Wrap the ribs in foil and smoke for another 2-hours. Remove the ribs and perform a tenderness test. Unwrap the ribs and brush a barbecue sauce onto the ribs. Place ribs back in the smoker unwrapped for 15 to 20- minutes to set glaze, then remove, rest and slice.
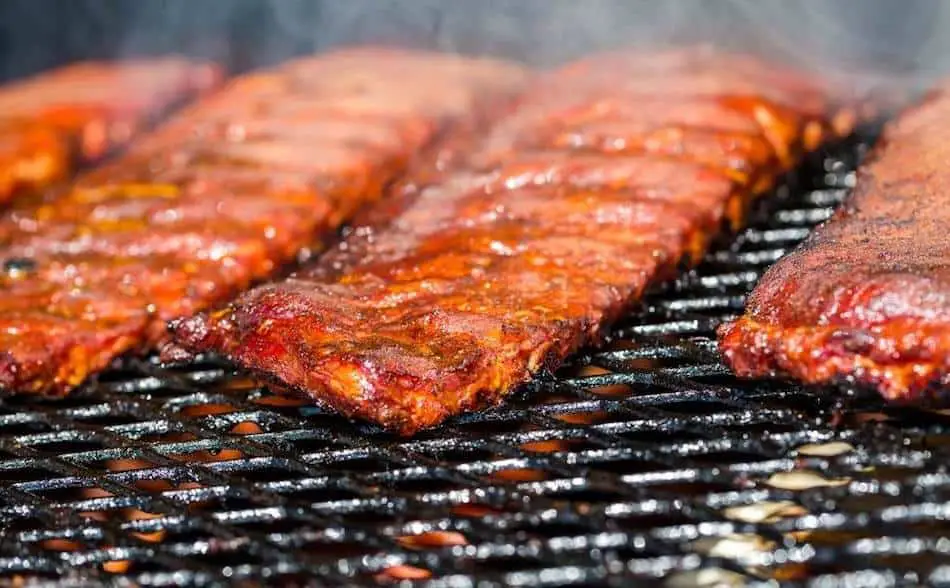
Competition Style Ribs On A Pellet Grill

The 3 2 1 method of smoking ribs is a barbecue technique used by pitmasters to ensure tender, smoked ribs. This recipe involves smoking the ribs for 3 hours uncovered, then 2 hours wrapped, then another hour unwrapped with a glaze.
Ingredients
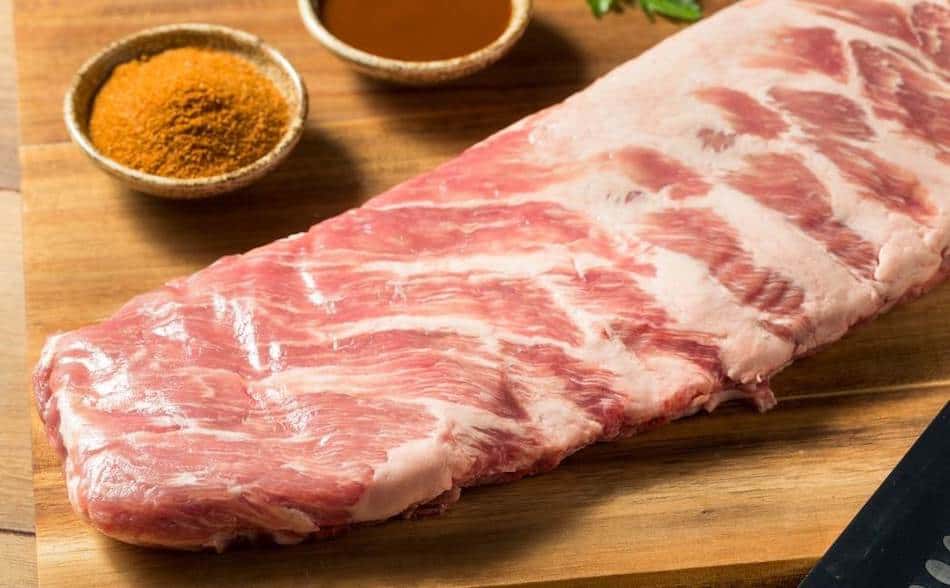
- 1 rack of pork spare ribs (you can use the same method for baby back ribs)
- Barbecue sauce.
- Rub:
- Paprika – ½ Cup
- Salt – ½ Cup
- Brown Sugar – ½ Cup
- Garlic Powder – ½ Cup
- Onion Powder – ¼ Cup
- Chilli Powder – ¼ Cup
- Cumin – ¼ Cup
- Black Pepper – 2 Tablespoons
Instructions
1. Trim the Ribs. Before you do anything, remove the membrane from the ribs. If you leave this on, the ribs will be too chewy and it will prevent the flavours from penetrating the meat between the ribs. The membrane is easy to remove with your fingers, just make an incision and then try get your finger underneath and pull. Also, trim any excess fat from the ribs.
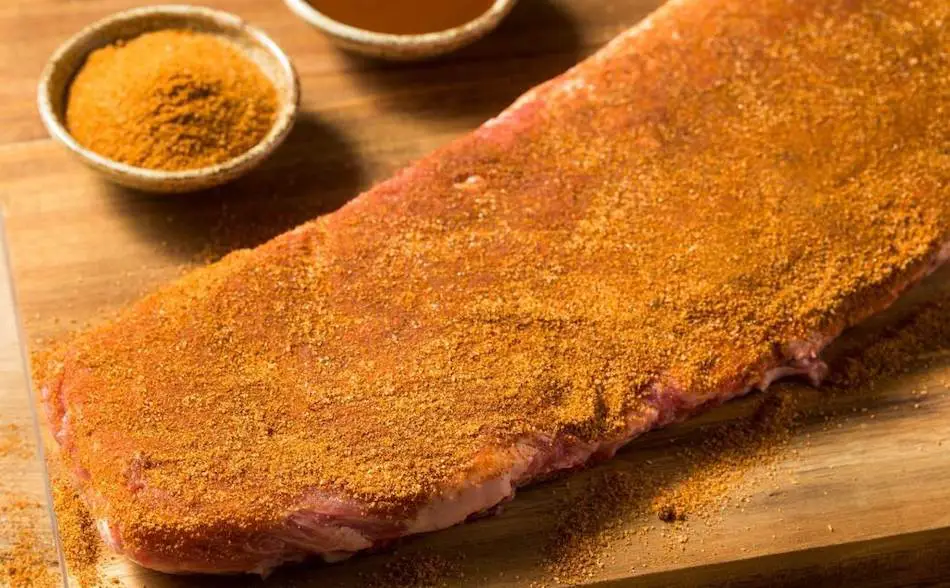
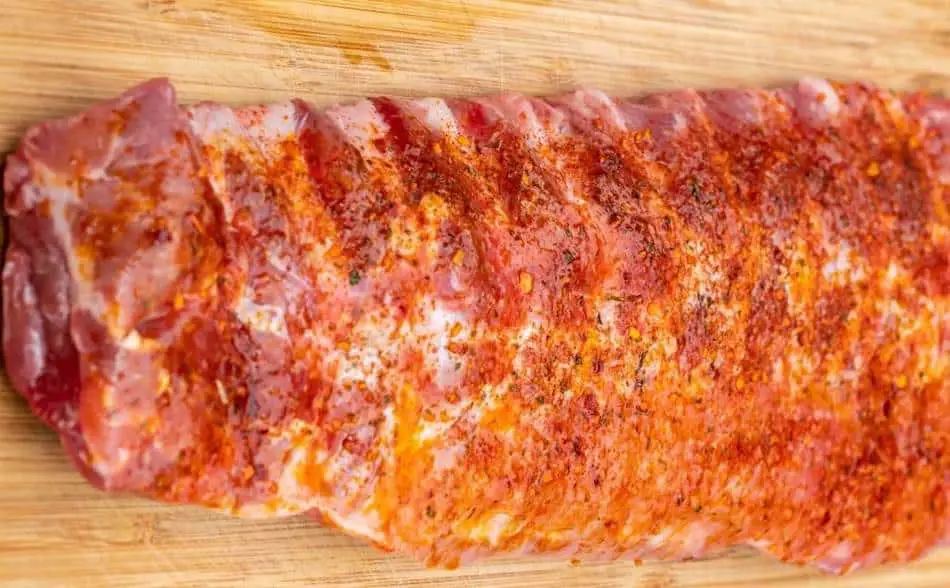
2. Apply The Rub. Combine the rub ingredients, or use a pre-made and add a good layer on the front and back, giving both sides both sides a decent coating of rub and spice. Once you have applied the seasoning, leave the meat about 30-minutes to 1 hour to let the rub work its way into the meat and draw out some moisture.
3. Wood Pellets. You can use whatever wood pellets you like; hickory, apple, cherry or pecan work well with pork ribs, but wood choice comes down to preference.
4. Light Your Pellet Grill. Fire Up Your Pellet Grill, setting the temperature to 250°F
5. Cook for 3 hours. Lay the ribs on the grill uncovered and close the lid. Let the ribs soak up the smoke for 3 hours. This is the "3" in the 3-2-1 method.
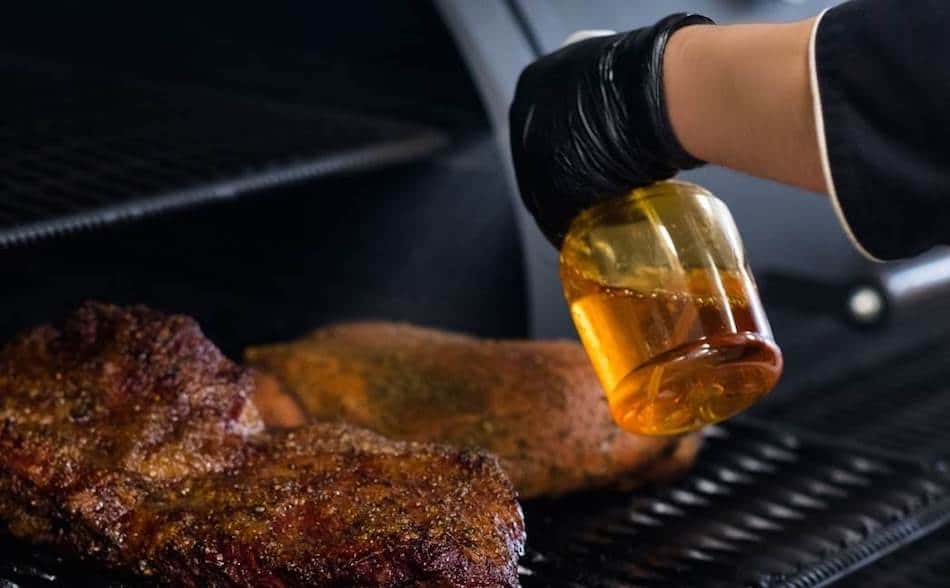
6. Spritz. During the first 3-hours, spritz the ribs every hour using apple juice or apple cider vinegar.
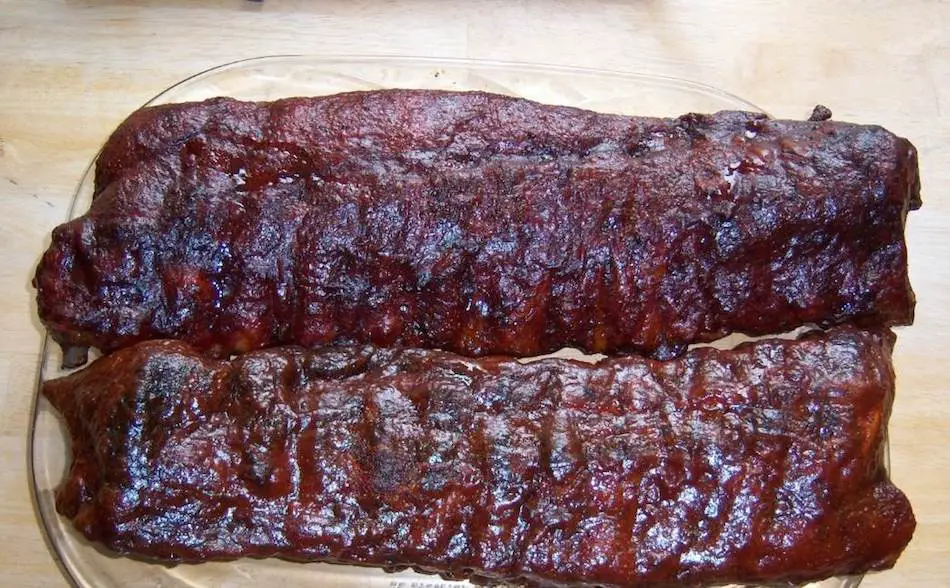
7. Wrap. Once the ribs have turned into a dark mahogany color, remove the ribs from the pellet grill and double wrap them in thick, heavy-duty aluminium foil. Give the ribs one last spritz before sealing the foil.
8. Cook For 2 More Hours. Place the wrapped ribs back in the pellet grill and smoke them for another 2 hours. This step is the "2" in the 3-2-1 method.
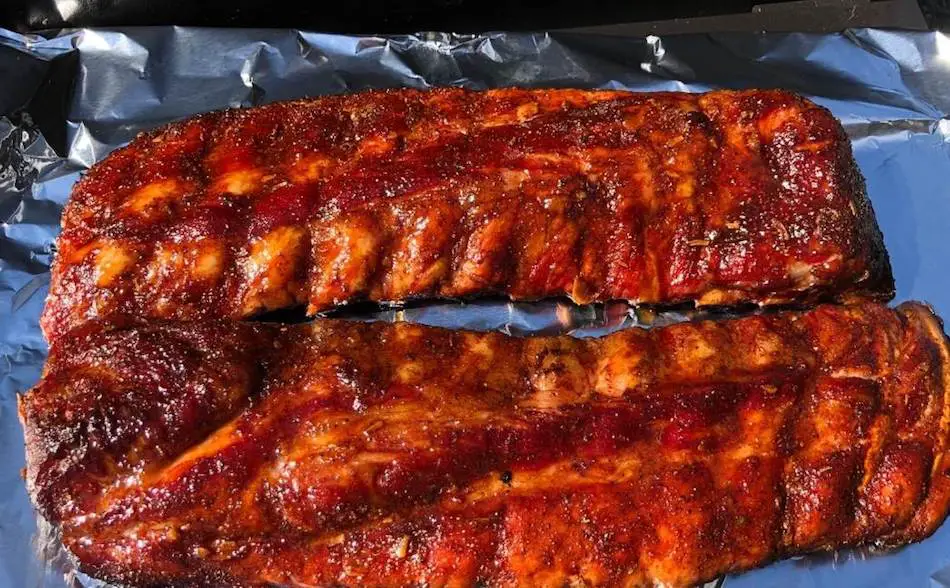
10. Remove and Unwrap. Remove the ribs from the pellet grill. Unwrap the foil, then place the ribs back onto the grill for 1 hour unwrapped, (apply the glaze in last 20 minutes).
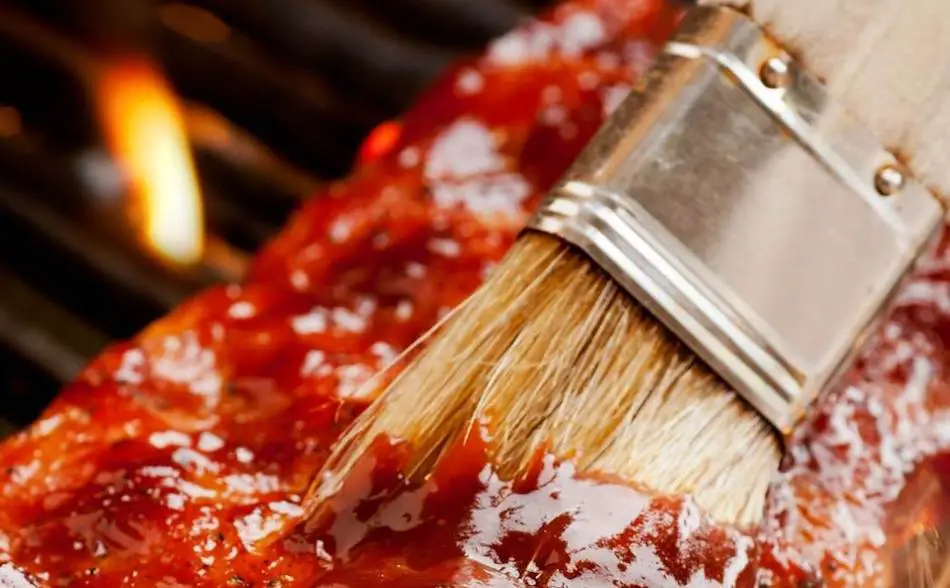
11. Apply The Glaze. In the last 20 minutes of the cook, remove the ribs from the pellet grill and brush barbecue sauce onto both sides on the ribs. Place the ribs back onto the grill for 20 minutes until the glaze is set.
12. Rest. Remove the ribs from the pellet grill and let them rest for about 10-minutes.
13. Slice. Take a knife and slice the ribs between the bones.
Nutrition Information:
Yield:
2Serving Size:
240g (half rack or 6 ribs)Amount Per Serving: Calories: 762Total Fat: 516gSaturated Fat: 17gCholesterol: 194mgSodium: 737mg
The 7 Types of Pork Ribs
There are 7 common types of pork ribs, and they are all suitable for smoking on a pellet grill. Spare ribs are common and affordable, and mostly contain bone and cartilage. If you want meaty ribs, baby backs and St Louis ribs have a lot of meat between the bones. Baby Backs are from the top section of the rib cage contain 8-13 ribs and have a nice amount of loin meat between the bones.
St Louis style ribs are taken from the pork belly and have the cartilage removed and served in a barbecue sauce. Similar to the St Louis ribs are the Kansas City ribs, which are similar except they are served with a tomato sauce. There are other types of ribs that you can buy from your butcher, or prepare yourself.
| Pork Ribs | Location | Ribs Per Rack | Meat | Description |
| Baby Backs | Pork Loin | 8 to 13 | Large amount of high-quality meat from the loin | Baby Back ribs are attached to the pork loin, where we get pork loin chops. |
| Spare Ribs | Pork Belly | 11 to 13 | Moderate level of meat | High in fat and bone cartilage. Lots of flavor. |
| St. Louis Style Ribs | Pork Belly | 12 to 13 | Moderate level of meat | These ribs are taken from the spare ribs, but with the sternum, rib tips and cartilage removed. Normally served with a thick barbecue sauce. |
| Kansas City Style Ribs | Pork Belly | 12-13 | Moderate | Kansas City style ribs are cut similar to St.Lous ribs, although the cartilage is left in place and served with a tomato sauce. |
| Rib tips | Pork Belly | 4 to 6 (2 inch ribs) | Moderate | Small cuts of cartilage taken from the spare ribs with no bones. Served with a sticky Asian or barbecue sauce. |
| Riblets | Pork Belly | 22 to 26 (half-sized ribs) | Moderate | To make riblets, a butcher will cut a rack of spare ribs down the middle, then slice into single ribs. Usually served with a sticky Asian or barbecue sauce. |
| Country Ribs | Pork Shoulder | 8 ribs per shoulder | Extremely meaty | These ribs appear more like a pork forequarter chop and contain more meat than bone. Located near the Baby Back ribs, these ribs are removed from the shoulder. |
Selecting the Right Cut of Ribs
The first step in smoking competition-style pork ribs is selecting the right cut. In the competition world, the two most popular cuts are St. Louis style and baby back ribs. St. Louis style ribs are cut from the pork loin and have a flatter shape, while baby back ribs come from the upper part of the pork loin and have a curved shape.
Both cuts can be delicious when cooked properly, but they do require slightly different preparation and cooking methods.
St. Louis style ribs have a bit more fat marbling which can make them more flavorful, but they also have a bit more cartilage and require a longer cooking time to break down. They are also a bit larger and meatier than baby back ribs, making them a great option for those who like a heartier rib.
On the other hand, baby back ribs are leaner and more tender. They have a smaller bone-to-meat ratio, which makes them perfect for those who prefer a more delicate rib. They also have a shorter cooking time, and are great for those who are short on time.
While both cuts can be delicious, they do require slightly different preparation and cooking methods, so it’s important to choose the right one for your needs.
Trimming and Prepping the Ribs
Once you’ve selected the cut of ribs you want to use, the next step is to prepare them for smoking. This includes several important steps:
First, you’ll need to remove the thin membrane on the back of the ribs, also known as the “fell.” This membrane can make the ribs tough if left on and is typically removed by carefully sliding a butter knife or a pair of tweezers under the membrane and gently pulling it off. This step is important for ensuring that the ribs are tender and easy to eat.
Next, some competition pitmasters also trim the rib tips, or the end of the rib bones, to create a more uniform appearance. This is not a necessary step, but it can make the ribs look more attractive when they are presented. Simply cut off the excess meat and fat from the rib tips, being careful not to remove too much meat from the ribs themselves.
Finally, you’ll want to apply a dry rub of your choice to the ribs. A dry rub is a mixture of spices that can be used to add flavor and color to the meat. There are many different dry rub recipes available online, or you can make your own by mixing together your favorite spices. Be sure to apply the rub evenly over the ribs, and let it sit for at least an hour before smoking to allow the flavors to penetrate the meat.
Creating the Perfect Dry Rub
Creating the perfect dry rub is essential to making competition-style pork ribs. This is a blend of spices that is rubbed onto the meat before cooking. A good dry rub should have a balance of sweet, savory, and spicy flavors. The exact ingredients will vary depending on personal preference, but common ingredients include brown sugar, salt, pepper, chili powder, paprika, and garlic powder.
The key to a good dry rub is finding the right balance of flavors that will complement the natural flavor of the pork ribs. For example, brown sugar adds a touch of sweetness that helps to balance out the savory flavors of the meat. Salt and pepper are essential seasonings that bring out the natural flavors of the pork. Chili powder and paprika add a bit of heat and a smoky flavor that enhances the overall taste of the ribs. Garlic powder brings a nice depth of flavor and aroma to the mix.
When creating your own dry rub, start with a small amount of each ingredient and taste as you go, adjusting the flavors to suit your taste. Keep in mind that you can always add more, but it’s difficult to take away once it’s added. It’s also a good idea to make a larger batch of dry rub and store it in an airtight container for future use.
Once you’ve created your dry rub, generously apply it to your ribs, making sure to cover all surfaces of the meat. Allow the ribs to sit for at least an hour, or even overnight if possible, to allow the flavors to penetrate the meat. This will give you the most flavorful and delicious competition-style pork ribs.
Dry Rub Ingredients
| Ingredient | Purpose |
|---|---|
| Brown Sugar | Adds sweetness |
| Salt | Enhances the natural flavor of the meat |
| Pepper | Adds a spicy kick |
| Chili powder | Adds a smoky flavor |
| Paprika | Enhances the color of the bark |
| Garlic powder | Adds a savory flavor |
Smoking the Ribs
When it comes to smoking competition-style pork ribs, the key is to cook them low and slow, just like a true pitmaster. I prefer using a wood-fired pit, and using a variety of wood such as hickory, pecan or oak. These woods have a strong, smoky flavor that will give the ribs a unique taste and aroma that is perfect for competition-style barbecue.
A typical cooking temperature is around 225°F, and it typically takes about 6 hours to smoke a rack of St. Louis style ribs and 4 hours for baby back ribs. Now, don’t be in a rush, good barbecue takes time. The low and slow cooking method allows the fat and connective tissue to break down and render, making the ribs incredibly tender and flavorful.
During the smoking process, it’s important to spritz the ribs with a mixture of water and apple juice, or water and apple cider vinegar to keep them moist. This will help to prevent the ribs from drying out and will also add an extra layer of flavor. I like to use a spray bottle to spritz the ribs every 30 minutes or so, but you can adjust the frequency to your preference.
It’s also important to monitor the internal temperature of the ribs using a meat thermometer. The ribs are done when the internal temperature reaches around 195°F to 205°F. At this point, you can remove the ribs from the pit and wrap them in foil or butcher paper to rest for about 30 minutes before serving. This will allow the juices to redistribute throughout the meat, making the ribs even more tender and flavorful.
With the right technique and a little patience, you’ll be able to smoke delicious, competition-style pork ribs that will have your friends and family coming back for seconds.
The 3-2-1 Method
The 3-2-1 method is a popular technique for smoking pork ribs, however, some pitmasters like Meathead Goldwyn believe that the method overcooks the ribs and turns them to mush. I think the 3-2-1 method is a good guide for beginners, but not many pitmasters cook ribs this way, instead, most prefer to cook to tenderness, not a strict time.
The main issue with the 3-2-1 method is that it doesn’t take into account the size, thickness, or starting temperature of the ribs. Pork ribs can vary greatly in size and thickness, and if they are not cooked to the right internal temperature, they can become overcooked and turn to mush.
From what I have seen, most pitmasters prefer to cook ribs to tenderness rather than a strict time. This means that they use a meat thermometer to check the internal temperature of the ribs, and when they reach the desired level of tenderness, they are removed from the smoker. This method is more precise, and it ensures that the ribs are cooked to perfection, rather than being overcooked or undercooked.
Create the Perfect Bark on Ribs
One of the most important factors in competition-style pork ribs is creating the perfect bark. This is the dark, crusty layer that forms on the outside of the meat as it cooks. A good bark should have a balance of sweetness, savoriness, and a hint of spice. It should also have a nice texture, not too hard, not too soft, just right. To get the perfect bark, apply a thick layer of dry rub to the ribs before cooking, and to avoid wrapping them in foil or using a mop sauce during the cooking process.
The dry rub is what gives the bark its flavor and color, so make sure to apply a generous amount to the ribs. When the dry rub is cooked, it forms a crust on the surface of the meat that creates a protective barrier that locks in the moisture and flavor. This crust also becomes a surface for the smoke to cling to and create the perfect bark.
If you want a nice bark, avoid wrapping the ribs in foil or using a mop sauce while cooking. Wrapping the ribs in foil will trap the moisture inside and prevent the bark from forming, while a mop sauce will create a glossy finish rather than a crusty one. So keep the ribs exposed to the smoke, then you’ll be able to get the perfect bark that is so sought-after in competition barbecue.
Spare Ribs 3-2-1 Method
The 3-2-1 method is a popular technique for smoking spare ribs. The first step is to prepare the ribs by removing the membrane and trimming any excess fat. Next, season the ribs with a sweet rub that blends well with pork, adding a good layer on the front and back, and letting it sit for 30-minutes to 1 hour.
Then the ribs are smoked for 3 hours, wrapped in foil with a bit of liquid, such as apple juice or honey, for 2 hours, and then unwrapped and glazed with barbecue sauce or other glaze of your choice for 1 hour. This method is designed to achieve tender and flavorful ribs that are cooked through but not dry.
| Step | Description |
|---|---|
| 1 | Prepare the ribs by removing the membrane and trimming any excess fat |
| 2 | Season the ribs with your favorite rub. Add a good layer on the front and back. Let the rub sit for 30-minutes to 1 hour |
| 3 | Smoke the ribs for 3 hours |
| 4 | Wrap the ribs in foil with a bit of liquid, such as apple juice or honey and return them to the smoker for 2 hours |
| 5 | Unwrap the ribs and glaze with barbecue sauce or other glaze of your choice and return to the smoker for 1 hour. |
Spritz Ingredient
| Ingredient | Purpose |
|---|---|
| Apple Juice or Apple Cider Vinegar | Keeps ribs moist and adds sweetness |
| Water | Keeps ribs moist |
This brisket injection marinade is the secret used in competitions and made by a World Barbecue champion.
Wrapping the Ribs
Wrapping ribs in foil during the cooking process is a technique known as the “Texas Crutch.” This method helps to speed up the cooking time and ensures that the ribs stay moist and tender.
Once the ribs have turned into a dark mahogany color on the pellet grill, it’s time to wrap them in foil. To do this, remove the ribs from the grill and double wrap them in thick, heavy-duty aluminum foil. It’s important to make sure the ribs are wrapped well because if the foil is pierced, moisture will escape and the ribs may dry out.
Before wrapping the ribs, it’s a good idea to give them a final spritz of liquid, such as apple juice or beer, to add some extra moisture. This will help to keep the ribs from drying out during the final stage of cooking.
Once the ribs are wrapped, place them back on the pellet grill and smoke them for about 1.5 hours. This will allow the flavors to meld together and the ribs to cook to perfection.
It’s important to note that the Texas Crutch method is most commonly used for spare ribs and baby back ribs, which tend to take longer to cook than other cuts.
After the 1.5 hours, take the foil-wrapped ribs out of the grill and let them rest for about 10-15 minutes before unwrapping and cutting them. This will allow the juices to redistribute and the meat will be more flavorful and juicy.
The Tenderness Test
Remove the ribs from the pellet grill and open the foil. The best way to know if ribs are done is by feel and sight. At this stage, the ribs will nearly be done and the bones should have some pull back. You can get a temperature with an instant-read thermometer, and you are looking for around a 200°F meat temp.
Most people don’t bother using thermometers with ribs because they are difficult to probe.
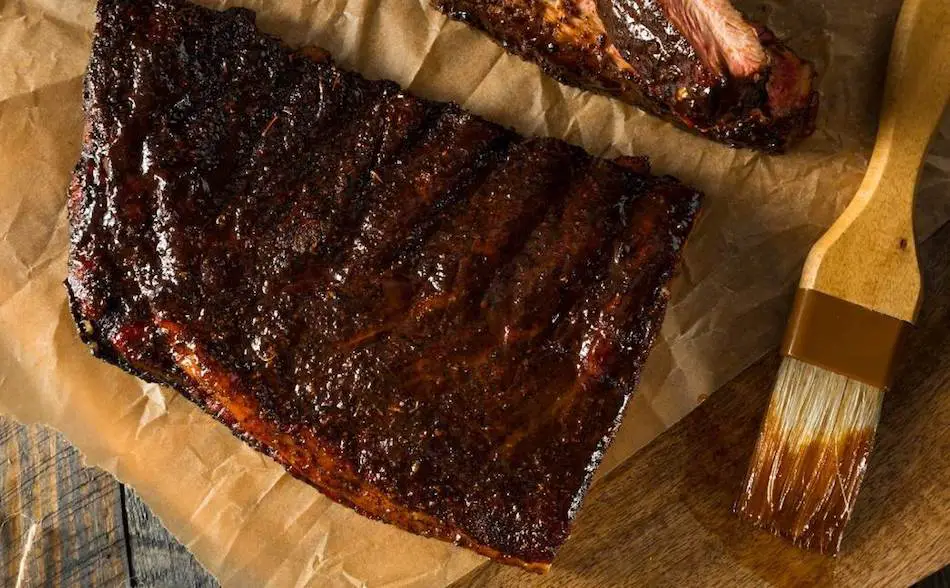
Glazing the Ribs
The last stage is to apply a glaze and finish the ribs in the pellet smoker unwrapped. Unwrap the ribs and remove them from the foil and brush both sides of the ribs with your favorite glaze for pork ribs. Once you have coated the ribs with a sauce/glaze, place them back in the smoker uncovered.
Close the lid of your pellet smoker and let the ribs cook in the smoke for about another 15-20 minutes. All you want to do in this last stage of the cook is let the glaze set and caramelize, so careful not to overcook the ribs and don’t let the sauce/glaze burn.
The Best Glaze For Pork Ribs
For the glaze, you can make your own or use a pre-made BBQ sauce:
- Barbecue sauce
- Plum sauce
- Hoisin sauce
- Teriyaki
- Satay Sauce
Resting Ribs
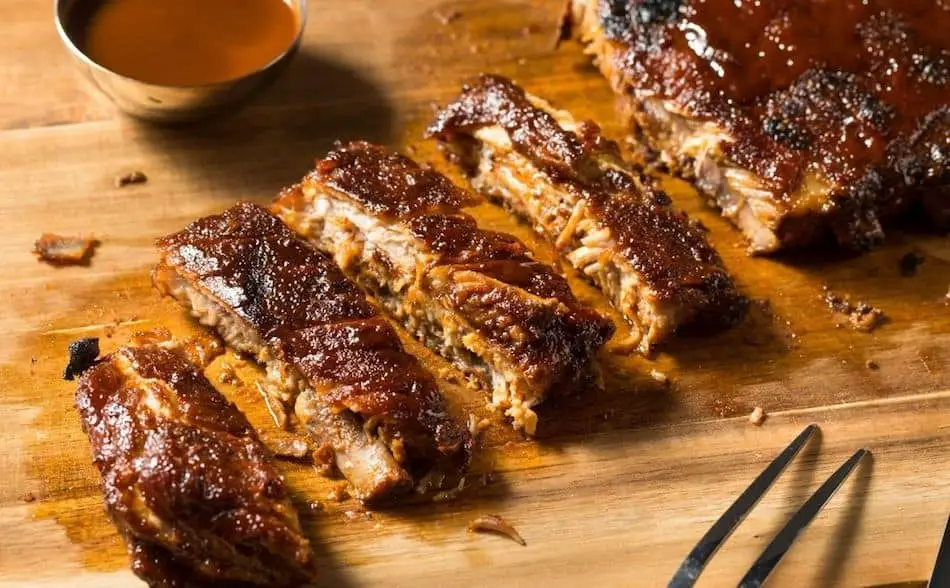
Remove the ribs from the pellet grill and let them rest for about 10-minutes. Take a knife and slice the ribs between the bones. The secret to cooking ribs is to ensure the meat is still attached to the bones. You don’t want the ribs so tender or overcooked where they fall off the bone.
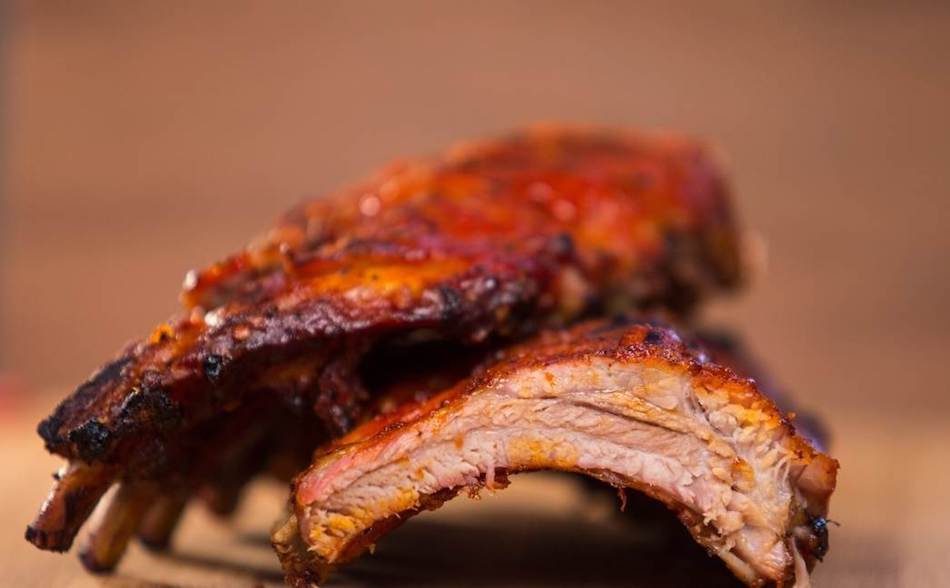
Part of the rib eating experience is eating the meat off the bone. The perfect smoked rib should almost fall off the bone, but not quite. If you’ve smoked the ribs right, there should be a nice smoke ring lining the outer layer of the meat.
Baby Back Ribs
The thing that sets baby back ribs apart from other ribs is the tender rib eye meat between the bones. Baby backs are taken from the top of the rib cage have anywhere between 8 and 13 ribs. Since there is more meat on these ribs, you need to cook them differently to spare ribs.
Rather than using the 3-2-1 method as you would with spare ribs, baby backs are best smoked using the 2-2-1 method, which is 2 hours unwrapped, 2 hours wrapped, then 1 hour unwrapped with a glaze. However, this is only a guide that you can alter.
How To Smoke Baby Backs on a Pellet Grill
Most pitmasters cook baby back ribs in three stages using the 2-2-1 method. However, this method is only a guide. The first stage of the cook is 2-hours unwrapped, followed by 2-hours wrapped in foil, then the last hour, cook the ribs unwrapped with a glaze.
Ingredients
- 1 set of baby back ribs
- Dry rub
- Yellow mustard or olive oil for the binder
- Barbecue sauce for the glaze
- For the spritz, use either apple cider vinegar, beer, or apple juice.
Baby Backs: Step-by-Step
| Method | Steps |
|---|---|
| 1 | Trim. Remove the thin membrane from the ribs. |
| 2 | Binder. Apply a layer of mustard or olive oil to the baby back ribs. |
| 3 | Dry rub. Apply a generous amount of seasoning with your favorite dry rub, or make your own dry rub. |
| 4 | Refrigerate. Let the rub absorb into the meat for 2 hours. |
| 5 | Choose wood. Fill the hopper of your pellet grill with a fruit wood. |
| 6 | Temperature. Set your pellet grill in the 225°F range. |
| 7 | Cook. Place the baby back ribs onto the grill and cook for 2 hours. |
| 8 | Wrap. Wrap the ribs in foil with a final spritz and more dry rub. |
| 9 | Cook wrapped. Return the ribs to the grill and cook for another 2 hours. |
| 10 | Baste. Unwrap the ribs and apply the barbecue sauce with a basting brush. |
| 11 | Finish. Cook the ribs uncovered until tender. |
| 12 | Rest. Allow the ribs to rest for 20 minutes in the foil. |
St. Louis Ribs
St.Louis Ribs: Step-by-Step
| St. Louis Ribs | Description |
|---|---|
| St. Louis style ribs | ribs cut from the pork loin, with a dry rub seasoning. |
| Ingredients | 1 set of St. Louis cut spare ribs, Dry rub, Spritz sauce, Binder (olive oil or yellow mustard), Wood pellets (apple, cherry, oak, pecan or hickory). |
| Method | |
| Step | Description |
| 1 | Trim. Remove the thin membrane from the ribs. |
| 2 | Binder. Apply a layer of mustard or olive oil to the baby back ribs. |
| 3 | Dry rub. Apply a generous amount of seasoning with your favorite dry rub, or make your own dry rub. |
| 4 | Refrigerate. Let the rub absorb into the meat for 2 hours. |
| 5 | Choose wood. Fill the hopper of your pellet grill with a fruit wood. |
| 6 | Temperature. Set your pellet grill in the 225°F range. |
| 7 | Cook. Place the baby back ribs onto the grill and cook for 2 hours. |
| 8 | Wrap. Wrap the ribs in foil with a final spritz and more dry rub. |
| 9 | Cook wrapped. Return the ribs to the grill and cook for another 2 hours. |
| 10 | Baste. Unwrap the ribs and apply the barbecue sauce with a basting brush. |
| 11 | Finish. Cook the ribs uncovered until tender. |
| 12 | Rest. Allow the ribs to rest for 20 minutes in the foil. |
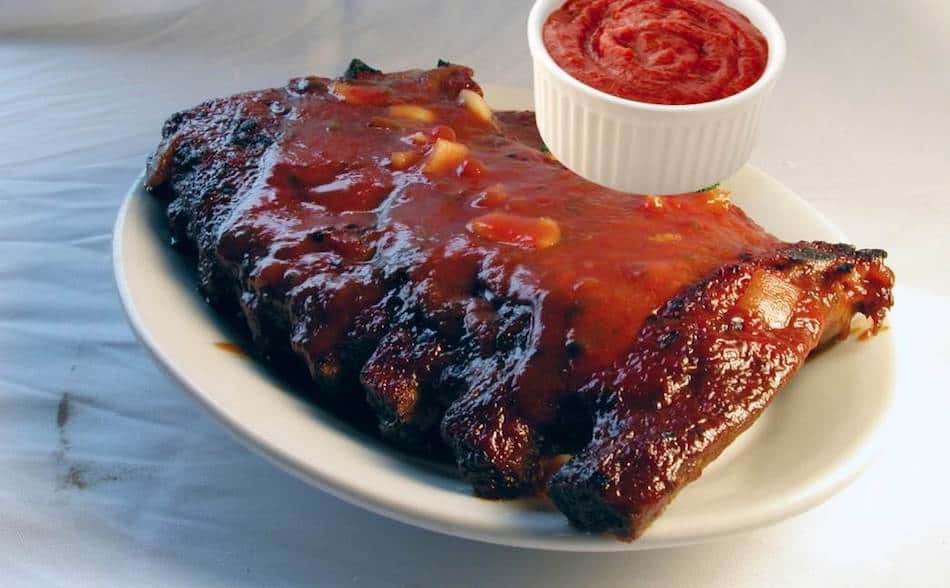
Kansas City Ribs
Kansas style ribs are ribs from the pork belly and are cut similar to St. Louis ribs but served with a sweet tomato sauce.
Ingredients:
- Pork spare ribs
- Mustard or olive oil
- Spritz (apple cider vinegar, or apple juice)
- Barbecue rub
- Wood pellets
- Kansas sweet tomato sauce
Kansas City Sauce Recipe
The famous Kansas-style tomato sauce is a sweet and spicy sauce, and goes well with ribs. Pork spare ribs are the best type of ribs to use for this recipe.
Kansas City Ribs: Step-by-Step
| Kansas City Ribs | Description |
|---|---|
| Kansas style ribs | Ribs from the pork belly, cut similar to St. Louis ribs, served with a sweet tomato sauce. |
| Ingredients | Pork spare ribs, Mustard or olive oil, Spritz (apple cider vinegar, or apple juice), Barbecue rub, Wood pellets, Kansas sweet tomato sauce |
| Kansas City Tomato Sauce Recipe | |
| Yield | 3 cups |
| Time | 5 minutes |
| Ingredients | 3 cups ketchup, 2 cup brown sugar, 1 cup of water, 2 tbsp Worcestershire sauce, 2 tbsp apple cider vinegar, 3.5 tsp salt, 1 tsp molasses, 1 tsp chilli powder, 1 tsp paprika, 1 tsp black pepper |
| Instructions | Mix all the ingredients then place over a low heat for a few minutes. remove the pot from the heat once the sauce has a nice, thick texture. |
| Kansas City Ribs on a Pellet Grill | |
| Step | Description |
| 1 | Cut and peel the membrane from the ribs. |
| 2 | Apply the binder to the ribs (mustard or olive oil). |
| 3 | Season both sides of the ribs with the dry rub. |
| 4 | Fill the pellet hopper with either hickory, apple, cherry, pecan or oak. |
| 5 | Bring the temperature of your pellet grill up to 250°F. |
| 6 | Smoke the spare ribs for 3 hours (spritzing every 45 minutes). |
| 7 | Wrap the ribs in foil and cook for 2 hours. |
| 8 | Remove ribs from the foil and baste with Kansas City tomato sauce |
| 9 | Place ribs back on the grill for 20 minutes or until tender. |
My Favorite Meat Smoking Tools
Thanks for checking out this article. I hope you learned a few things. Here are some of my favorite tools I use when smoking brisket that may be useful to you. These are affiliate links, so if you decide to purchase any of these products, I’ll earn a commission. But in all honesty, these are the tools I recommend to my family and friends who are just starting out.
Meat Thermometer: There are dozens of fancy thermometers on the market, but I still use my trusty TP20. For around $50, I have a high-quality meat thermometer with two probes, and can track the temperature of my smoker with one probe, and my meat with the other probe. The ThermoPro TP20 is an Amazon Best Seller because it’s the easiest thermometer to operate, is durable, highly accurate, and comes with pre-programmed meat settings.
Instant Read Thermometer: Arguably, the second most important tool you need is a fast and accurate instant-read thermometer. These tools play an important role in the latter stages of the cook when the meat needs regular checking in multiple areas. I use the ThermoPro TP19 because it can do everything a ThermaPen can do, but for a fraction of the cost. You can check out the TP19 on Amazon here.
Wireless Thermometer: The latest thermometers on the market have no wires and can be controlled by wi-fi via your phone. Airprobe 3 is the best of this technology.
Butcher Paper: Wrapping brisket in butcher paper has become a huge trend in barbeque thanks to Aaron Franklin. Wrapping your brisket in paper will give you a nice brisket bark. However, you can’t just use any old paper, it has to be unwaxed, food grade paper. You can find it on Amazon here.
Advanced Thermometer and Automatic Temperature Controller: Once you’re ready to take things seriously, the FireBoard 2 Drive is a six-channel Bluetooth/Wi-Fi thermometer that can monitor up to 6 pieces of meat, control and graph your cook sessions on your smartphone, and attaches to an an automatic blower that will convert your charcoal smoker to a set-and-forget. This is one of the most advanced meat thermometers on the market. You can check it out on the FireBoard website here.
Related: